Project 3

Overview
In this project, we will be implementing a simple shell that can start background process using the examples that were presented in chapter 5.
Learning Outcomes
- 1.2 Use system library code
- 1.3 Use system documentation
- 1.4 Apply computer science theory and software development fundamentals to produce computing-based solutions.
- 2.2 Explore the system call interface
Grading Rubric
Make sure and review the class grading rubric so you know how your project will be graded.
Task 1 - Setup
Follow the steps below to get your repository all setup and ready to use. The steps below show you how to use and setup GitHub codespaces. You are not required to use codespaces, all the steps below can be completed in the CS Lab or on your personal machine if you prefer.
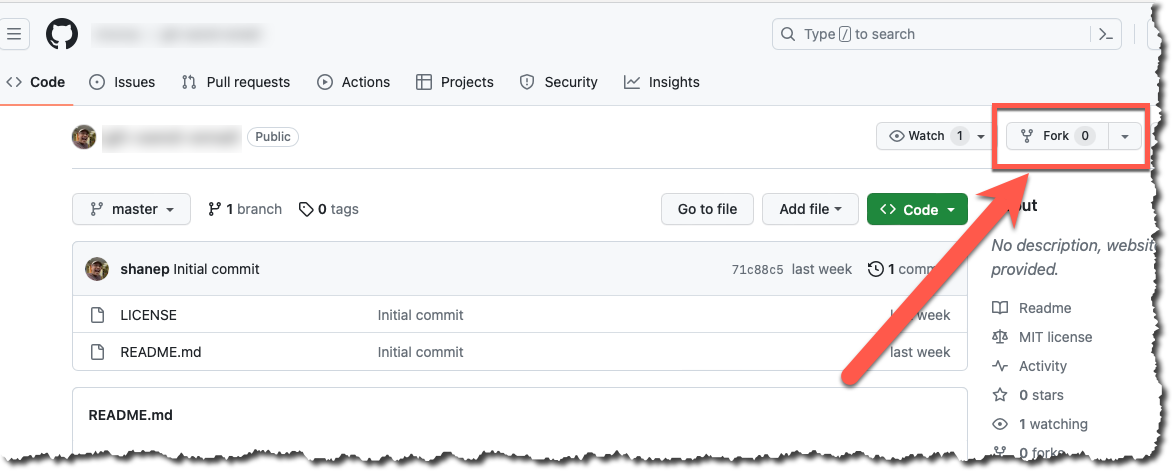
Fork the starter repository
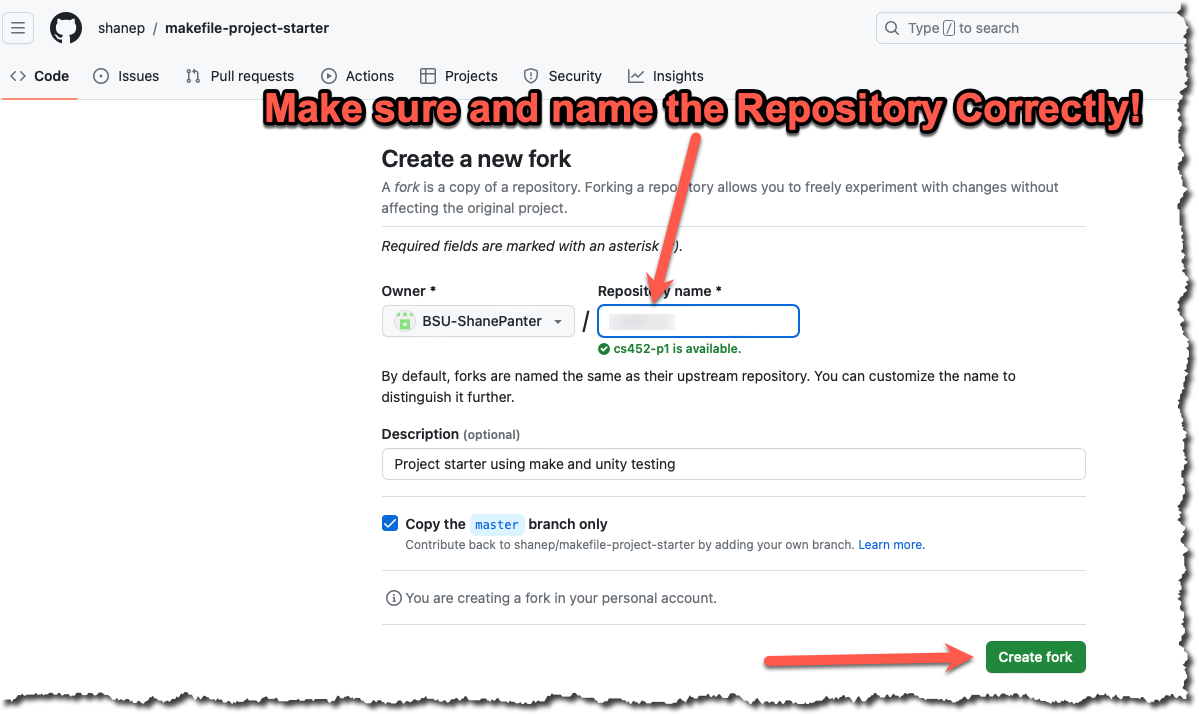
- Fork the starter repository into your personal GitHub account: https://github.com/shanep/makefile-project-starter
- In the new fork name the repository cs452-p3
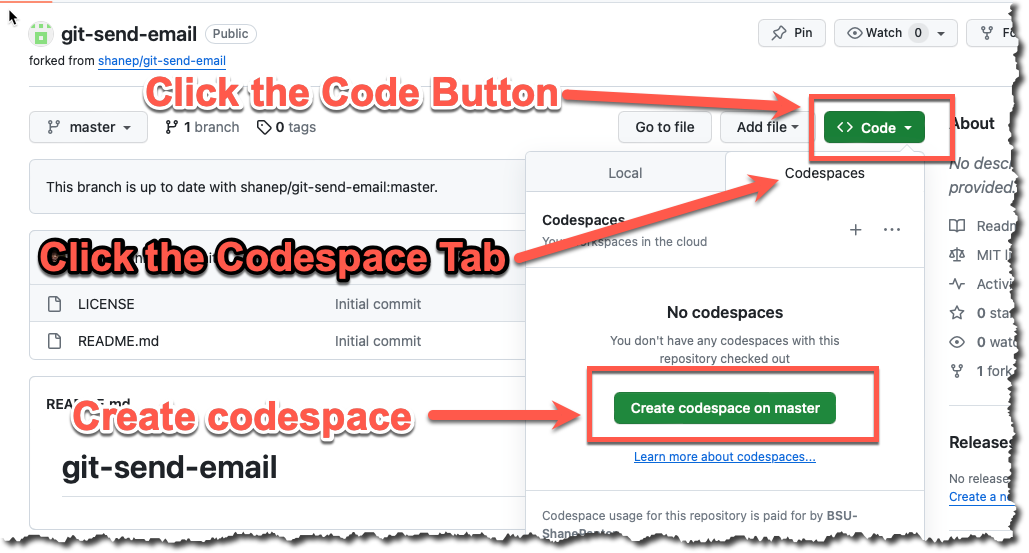
Start a new Codespace
We will use GitHub Codespaces to do most of our coding. Codespaces is just VSCode in the cloud. This makes it really easy to setup a developer environment and code from any computer that has a browser and internet connection!
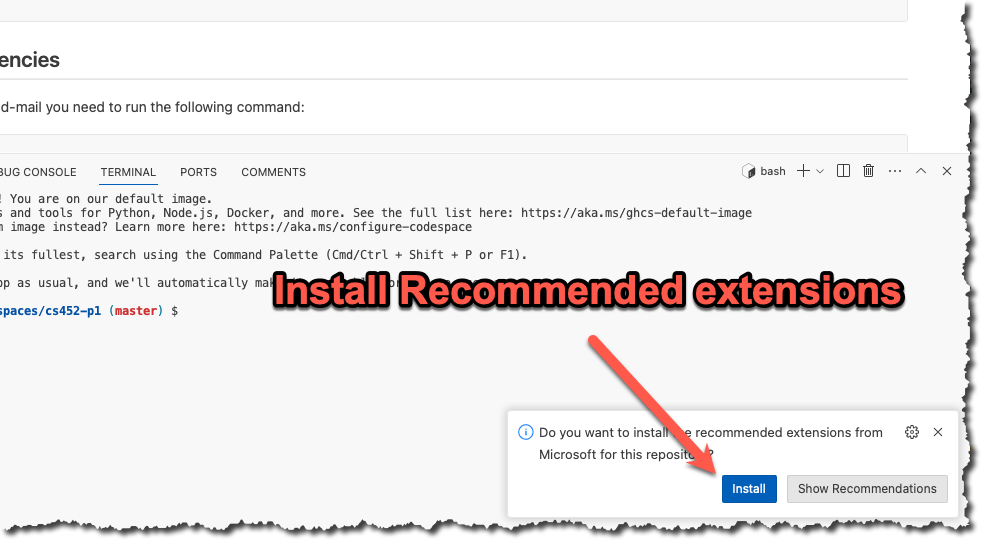
- If you are asked to install recommended extensions click "install". You may not be asked to install extensions if you are already syncing your account.
You now should have a new repository (forked from the starter template) that is ready to use.
Task 2 - Prepare your repository
The starter repository is a bare bones template that you will need to update with the starter code below.
src/lab.h
#ifndef LAB_H
#define LAB_H
#include <stdlib.h>
#include <stdbool.h>
#include <sys/types.h>
#include <termios.h>
#include <unistd.h>

#define lab_VERSION_MAJOR 1
#define lab_VERSION_MINOR 0
#define UNUSED(x) (void)x;

#ifdef __cplusplus
extern "C"
{
#endif

  struct shell
  {
    int shell_is_interactive;
    pid_t shell_pgid;
    struct termios shell_tmodes;
    int shell_terminal;
    char *prompt;
  };


  /**
   * @brief Set the shell prompt. This function will attempt to load a prompt
   * from the requested environment variable, if the environment variable is
   * not set a default prompt of "shell>" is returned.  This function calls
   * malloc internally and the caller must free the resulting string.
   *
   * @param env The environment variable
   * @return const char* The prompt
   */
  char *get_prompt(const char *env);

  /**
   * Changes the current working directory of the shell. Uses the linux system
   * call chdir. With no arguments the users home directory is used as the
   * directory to change to.
   *
   * @param dir The directory to change to
   * @return  On success, zero is returned.  On error, -1 is returned, and
   * errno is set to indicate the error.
   */
  int change_dir(char **dir);

  /**
   * @brief Convert line read from the user into to format that will work with
   * execvp. We limit the number of arguments to ARG_MAX loaded from sysconf.
   * This function allocates memory that must be reclaimed with the cmd_free
   * function.
   *
   * @param line The line to process
   *
   * @return The line read in a format suitable for exec
   */
  char **cmd_parse(char const *line);

  /**
   * @brief Free the line that was constructed with parse_cmd
   *
   * @param line the line to free
   */
  void cmd_free(char ** line);

  /**
   * @brief Trim the whitespace from the start and end of a string.
   * For example "   ls -a   " becomes "ls -a". This function modifies
   * the argument line so that all printable chars are moved to the
   * front of the string
   *
   * @param line The line to trim
   * @return The new line with no whitespace
   */
  char *trim_white(char *line);


  /**
   * @brief Takes an argument list and checks if the first argument is a
   * built in command such as exit, cd, jobs, etc. If the command is a
   * built in command this function will handle the command and then return
   * true. If the first argument is NOT a built in command this function will
   * return false.
   *
   * @param sh The shell
   * @param argv The command to check
   * @return True if the command was a built in command
   */
  bool do_builtin(struct shell *sh, char **argv);

  /**
   * @brief Initialize the shell for use. Allocate all data structures
   * Grab control of the terminal and put the shell in its own
   * process group. NOTE: This function will block until the shell is
   * in its own program group. Attaching a debugger will always cause
   * this function to fail because the debugger maintains control of
   * the subprocess it is debugging.
   *
   * @param sh
   */
  void sh_init(struct shell *sh);

  /**
   * @brief Destroy shell. Free any allocated memory and resources and exit
   * normally.
   *
   * @param sh
   */
  void sh_destroy(struct shell *sh);

  /**
   * @brief Parse command line args from the user when the shell was launched
   *
   * @param argc Number of args
   * @param argv The arg array
   */
  void parse_args(int argc, char **argv);


#ifdef __cplusplus
} // extern "C"
#endif

#endif
tests/test-lab.c
#include <string.h>
#include "harness/unity.h"
#include "../src/lab.h"


void setUp(void) {
  // set stuff up here
}

void tearDown(void) {
  // clean stuff up here
}


void test_cmd_parse2(void)
{
     //The string we want to parse from the user.
     //foo -v
     char *stng = (char*)malloc(sizeof(char)*7);
     strcpy(stng, "foo -v");
     char **actual = cmd_parse(stng);
     //construct our expected output
     size_t n = sizeof(char*) * 6;
     char **expected = (char**) malloc(sizeof(char*) *6);
     memset(expected,0,n);
     expected[0] = (char*)malloc(sizeof(char)*4);
     expected[1] = (char*)malloc(sizeof(char)*3);
     expected[2] = (char*)NULL;

     strcpy(expected[0], "foo");
     strcpy(expected[1], "-v");
     TEST_ASSERT_EQUAL_STRING(expected[0],actual[0]);
     TEST_ASSERT_EQUAL_STRING(expected[1],actual[1]);
     TEST_ASSERT_FALSE(actual[2]);
     free(expected[0]);
     free(expected[1]);
     free(expected);
}

void test_cmd_parse(void)
{
     char **rval = cmd_parse("ls -a -l");
     TEST_ASSERT_TRUE(rval);
     TEST_ASSERT_EQUAL_STRING("ls", rval[0]);
     TEST_ASSERT_EQUAL_STRING("-a", rval[1]);
     TEST_ASSERT_EQUAL_STRING("-l", rval[2]);
     TEST_ASSERT_EQUAL_STRING(NULL, rval[3]);
     TEST_ASSERT_FALSE(rval[3]);
     cmd_free(rval);
}

void test_trim_white_no_whitespace(void)
{
     char *line = (char*) calloc(10, sizeof(char));
     strncpy(line, "ls -a", 10);
     char *rval = trim_white(line);
     TEST_ASSERT_EQUAL_STRING("ls -a", rval);
     free(line);
}

void test_trim_white_start_whitespace(void)
{
     char *line = (char*) calloc(10, sizeof(char));
     strncpy(line, "  ls -a", 10);
     char *rval = trim_white(line);
     TEST_ASSERT_EQUAL_STRING("ls -a", rval);
     free(line);
}

void test_trim_white_end_whitespace(void)
{
     char *line = (char*) calloc(10, sizeof(char));
     strncpy(line, "ls -a  ", 10);
     char *rval = trim_white(line);
     TEST_ASSERT_EQUAL_STRING("ls -a", rval);
     free(line);
}

void test_trim_white_both_whitespace_single(void)
{
     char *line = (char*) calloc(10, sizeof(char));
     strncpy(line, " ls -a ", 10);
     char *rval = trim_white(line);
     TEST_ASSERT_EQUAL_STRING("ls -a", rval);
     free(line);
}

void test_trim_white_both_whitespace_double(void)
{
     char *line = (char*) calloc(10, sizeof(char));
     strncpy(line, "  ls -a  ", 10);
     char *rval = trim_white(line);
     TEST_ASSERT_EQUAL_STRING("ls -a", rval);
     free(line);
}

void test_trim_white_all_whitespace(void)
{
     char *line = (char*) calloc(10, sizeof(char));
     strncpy(line, "  ", 10);
     char *rval = trim_white(line);
     TEST_ASSERT_EQUAL_STRING("", rval);
     free(line);
}

void test_trim_white_mostly_whitespace(void)
{
     char *line = (char*) calloc(10, sizeof(char));
     strncpy(line, "    a    ", 10);
     char *rval = trim_white(line);
     TEST_ASSERT_EQUAL_STRING("a", rval);
     free(line);
}

void test_get_prompt_default(void)
{
     char *prompt = get_prompt("MY_PROMPT");
     TEST_ASSERT_EQUAL_STRING(prompt, "shell>");
     free(prompt);
}

void test_get_prompt_custom(void)
{
     const char* prmpt = "MY_PROMPT";
     if(setenv(prmpt,"foo>",true)){
          TEST_FAIL();
     }

     char *prompt = get_prompt(prmpt);
     TEST_ASSERT_EQUAL_STRING(prompt, "foo>");
     free(prompt);
     unsetenv(prmpt);
}

void test_ch_dir_home(void)
{
     char *line = (char*) calloc(10, sizeof(char));
     strncpy(line, "cd", 10);
     char **cmd = cmd_parse(line);
     char *expected = getenv("HOME");
     change_dir(cmd);
     char *actual = getcwd(NULL,0);
     TEST_ASSERT_EQUAL_STRING(expected, actual);
     free(line);
     free(actual);
     cmd_free(cmd);
}

void test_ch_dir_root(void)
{
     char *line = (char*) calloc(10, sizeof(char));
     strncpy(line, "cd /", 10);
     char **cmd = cmd_parse(line);
     change_dir(cmd);
     char *actual = getcwd(NULL,0);
     TEST_ASSERT_EQUAL_STRING("/", actual);
     free(line);
     free(actual);
     cmd_free(cmd);
}

int main(void) {
  UNITY_BEGIN();
  RUN_TEST(test_cmd_parse);
  RUN_TEST(test_cmd_parse2);
  RUN_TEST(test_trim_white_no_whitespace);
  RUN_TEST(test_trim_white_start_whitespace);
  RUN_TEST(test_trim_white_end_whitespace);
  RUN_TEST(test_trim_white_both_whitespace_single);
  RUN_TEST(test_trim_white_both_whitespace_double);
  RUN_TEST(test_trim_white_all_whitespace);
  RUN_TEST(test_get_prompt_default);
  RUN_TEST(test_get_prompt_custom);
  RUN_TEST(test_ch_dir_home);
  RUN_TEST(test_ch_dir_root);

  return UNITY_END();
}
Once you have updated all the starter code lets make your first commit so everything is saved. Open up a terminal and lets make a commit!
git add --all
git commit -m "Added in starter code"
Task 3 - Print Version
Let’s start off simple and just have our shell print off its version. When the shell is started with a command line argument -v, it prints out the version of the project and then quits, you will need to leverage the header file lab.h for the major and minor version. Parse the command line arguments with getop. The program should exit after printing the version.
Task 4 - User Input
While we could use a function like scanf to get input from the user a much more robust way would be to leverage the GNU Readline library. The GNU Readline library allows a program to control the input line and adds a bunch of cool functions that allow the user to edit the line, use TAB key for filename completion, and the use of up arrow, down arrow, left arrow and right arrow keys to access the history of commands typed in by the user. You will need to include the header files readline/readline.h and readline/history.h to use the readline functions.
#include <readline/readline.h>
#include <readline/history.h>
char *line;
using_history();
while ((line=readline("$"))){
    printf("%s\n",line);
    add_history(line);
    free(line);
}
You need to install both the readline header files and development libraries for the above code to compile and link. All the correct libraries are installed on the lab machines. On Redhat based machines development packages end in devel. So to get all the readline development packages you would need to install readline-devel as well as readline. On ubuntu the development files are named readline-dev.
The readline documentation is a good starting point on how to use the readline library. Pay close attention to memory ownership. Remember that C does not have a garbage collector.
Task 5 - Custom Prompt
The default prompt for the shell may be anything you like. However the shell checks for an environment variable MY_PROMPT. If the environment variable is set, then it uses the value as the prompt. The environment variable can be set inline MY_PROMPT="foo>" ./myprogram so you can quickly test your program.
- Use the system call getenv to retrieve environment variables
Task 6 - Built in Commands
Now that we can get input from users lets add in some built in commands. These commands need to be handled by the shell itself, you should not create a new process to handle these commands so it is good to implement these before you add in the fork/exec code in a future task.
Exit command
Include a built-in command named exit that terminates the shell normally. Your shell should return a status of 0 when it terminates normally and a non-zero status otherwise. Your shell should also terminate normally on receiving the end of input EOF (Under Linux and bash, this would normally be Ctl-d for you to test your mini-shell). You are required to clean up any allocated memory before you exit.
Change Directory Command
Include a built-in command named cd to allow an user to change directories. You will need to use the chdir system call. The cd command without any arguments should change the working directory to the user’s home directory. You must first use getenv and if getenv returns NULL your program should fall back to the system calls getuid and getpwuid to find out the home directory of the user. Make sure to print an error message if the cd command fails.
History Command
Add a new built in command to your shell to print out a history of command entered. You should leverage the history library library to accomplish this.
Task 7 - Create a Process
Our shell will create a new process and wait for it to complete. The shell accepts one command per line with arguments. It should accept at least ARG_MAX arguments to any command. You will need to use the system call sysconf and _SC_ARG_MAX to get the maximum length of arguments that the the exec family of functions can accept. The shell will parse each line that is entered and then attempt to execute the process using the execvp system call. The execvp system call performs a search for the command using the PATH environment variable. This will simplify your programming since you do not have to search for the location of the command.
For our simple shell you can assume that all command line arguments will be separated by spaces, you don’t have to worry about quoted arguments. For example given the command ls -l -a you would parse this string as an array of size 3 with the structure of ls → -l → and -a. The command ls "-l -a" would parse out to be ls → "-l → -a". If you want to write a parsing algorithm that handles quotes like bash more information is available at the linux documentation project.
If the user just presses the Enter key, then the shell displays another prompt. If the user types just spaces and then presses the Enter key, then the shell displays another prompt as this is also an empty command. Empty commands should not cause a segfault or memory leak.
Task 8 - Signals
The shell should ignore the signals listed below:
signal(SIGINT, SIG_IGN);
signal(SIGQUIT, SIG_IGN);
signal(SIGTSTP, SIG_IGN);
signal(SIGTTIN, SIG_IGN);
signal(SIGTTOU, SIG_IGN);
In the child process don’t forget to set these signals back to default!
/*This is the child process*/
pid_t child = getpid();
setpgid(child, child);
tcsetpgrp(sh.shell_terminal,child);
signal (SIGINT, SIG_DFL);
signal (SIGQUIT, SIG_DFL);
signal (SIGTSTP, SIG_DFL);
signal (SIGTTIN, SIG_DFL);
signal (SIGTTOU, SIG_DFL);
execvp(cmd[0], cmd);
fprintf(stderr, "exec failed\n");
If there is no process being executed, then the shell should just display a new prompt and ignore any input on the current line. You will need to use the tcgetpgrp and tcsetpgrp system calls to get and set the foreground process group of the controlling terminal and the signal system call to ignore and enable signals.
The glibc manual links below describe a full job control shell. You are not required to implement a job control shell to the same level of functionality. You can to use the documentation linked below as a guide but be aware you shell will probably fail to function correctly if you just copy and paste the code examples without understanding what they do. You are free to use code from the manual as long as you take the time to understand what it does and why.
Task 9 - Background Processes
Your shell can start a process in the background if an ampersand(&) is the last character on the line. For each background process that is started, it prints an id and the process id (pid) of the background process and the full command that was given by the user. After starting a background process, the shell comes back with a prompt ready to accept a new command from the user without waiting for the background process to finish. The user should not be required to separate the & from the command by a space. For example, the commands date & and date& are both valid. Additionally, blanks after the ampersand are valid as well.
The mini shell should keep track of process running in the background. Whenever the user starts a process in the background, it should assign and display the job number, the associated process id and the full command (including the ampersand).
[n] process-id command
It should also display an informative message when a background job is done. That is, every time the user presses the ENTER key, the shell should report all the background processes that have finished since the last time the user pressed the ENTER key. The message should be of the following form:
[n] Done command
Where n is the job number and command is the actual command that was typed. You should use the WNOHANG option with the waitpid system call to determine the status of background processes.
Task 10 - Jobs command
Add a new built-in command called jobs, that prints out all the background commands that are running or are done but whose status has not yet been reported. Here is a sample output:
[1] 3451 Running sleep 100 &
[2] Done    sleep 5 &
[3] 3452 Running gargantuan &
The first job should be assigned the job number 1. Each additional job should be assigned one higher number. If lower numbered jobs finish, then we do not reuse them unless all jobs numbered higher than that number have also finished.
Additional Resources
Below are some links to some awesome documentation for writing a job control shell which you should read through before you start coding as it will help you understand the problem space. However, be aware that the libc manual describes a much more complex shell than what we are building so don’t panic if you don’t understand everything in the manual.
Keep in mind that some of the code samples provided in the libc manual are written in C89 so may look a bit strange if you are used to only reading C99 code.
Final Task - Submit your code
Now that you have completed all the tasks the only thing left to do is to submit your code as a patch so you can receive a grade for all your hard work.
Turn on Two Factor
Turn on Two factor authentication for your Boise State provided email account
DANGER
Do NOT skip this step. Boise State University uses Gmail as their email provider and Gmail requires you to use two factor authentication in order to generate an app password.
You need to use your Boise State University issued email account to send the email and you must have two factor authentication turned on.
Generate an app password
INFO
If you are working in GitHub codespaces you will need to setup SMTP for EACH project. This is because each codespace is tied to a specific repository and the settings are not shared. However, if you are working on your own personal machine or in the CS Lab then you will only have to setup SMTP once!
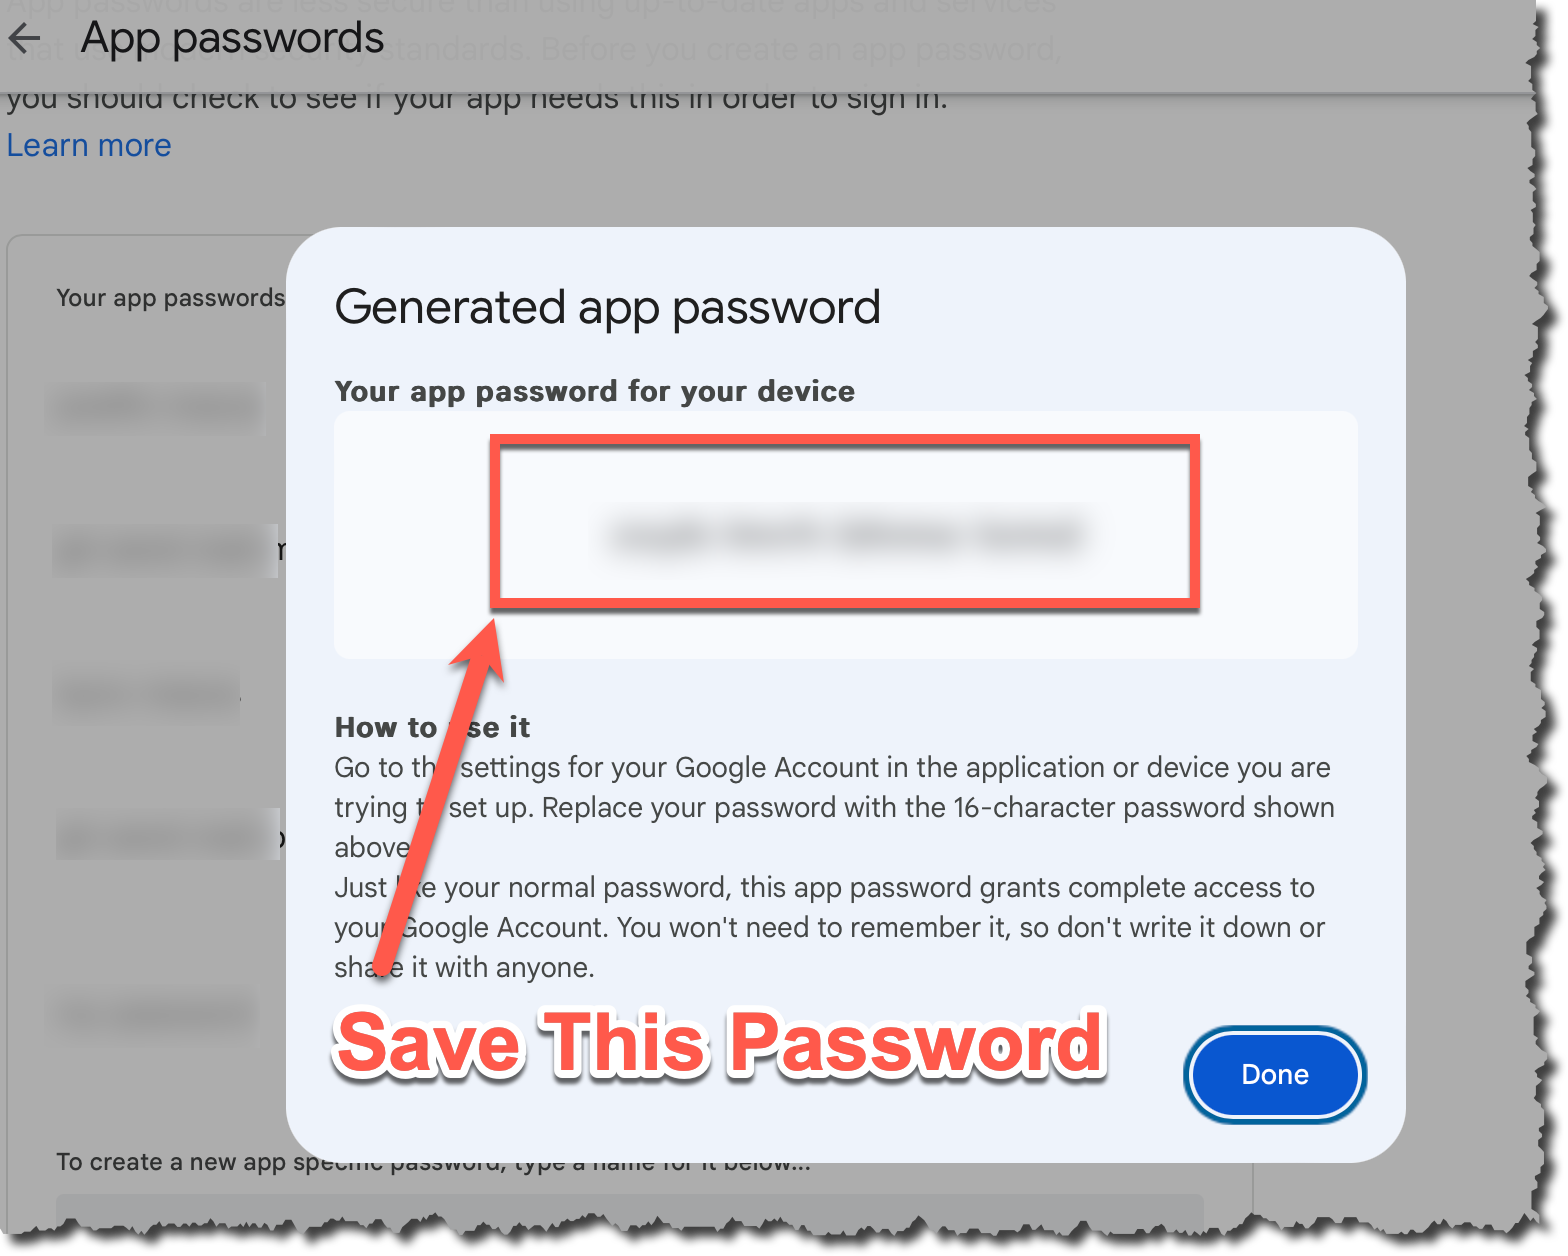
In order to use git send-email you will need to generate an app password. Navigate to https://security.google.com/settings/security/apppasswords and generate a new app password. Make sure and copy the password before you close the window because you will not be able to see it again.
I can't generate a password
If you get the error shown below it typically means that you have not enabled two factor authentication. Follow these steps to resolve the issue:
- Go back and ensure you have two factor authentication enabled.
- Log out of your Gmail account
- Log back into your Gmail account and make sure you did have to use two factor authentication
- If the steps above fail then open an incognito tab and go back to the first step
- If you still have issues reboot your machine and go back to the first step

Setup SMTP
- Open up a terminal in codespaces
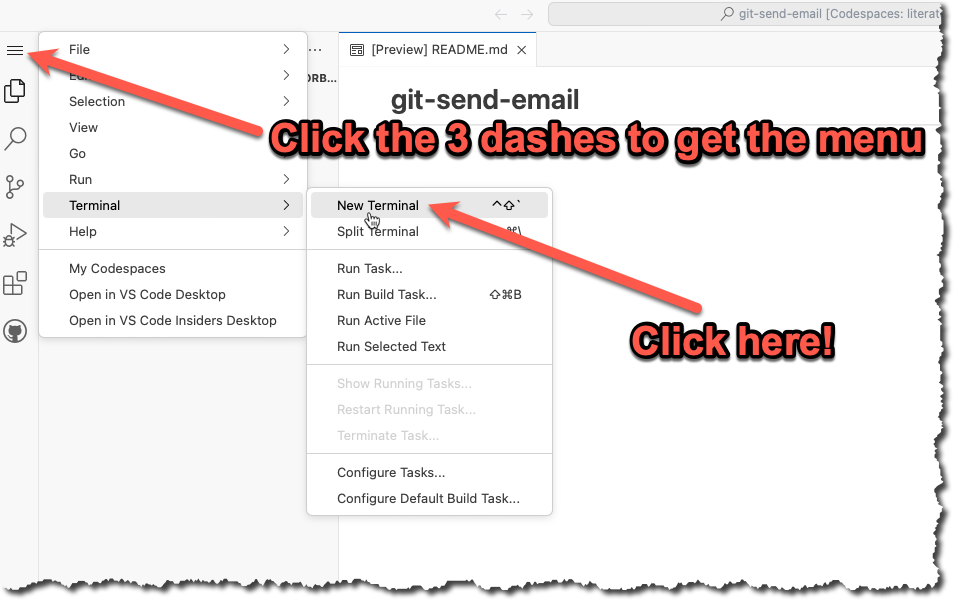
- In the terminal type
git config --global --editand modify the file with the info listed below. You will need to change the info listed below to match your own name, email and App Password that you generated in the previous step.
[User]
	name =  YOUR NAME
	email = YOURNAME@u.boisestate.edu
[sendemail]
	smtpserver = smtp.gmail.com
	smtpuser = YOURNAME@u.boisestate.edu
	smtpPass = xxxx xxxx xxxx xxxx
	smtpencryption = ssl
	smtpserverport = 465
Congrats you should be all setup to send code patch's over email. Now lets create a patch!
Create a patch file
We are now going to do what is called a squash merge and then create a patch file with all our changes in one commit.
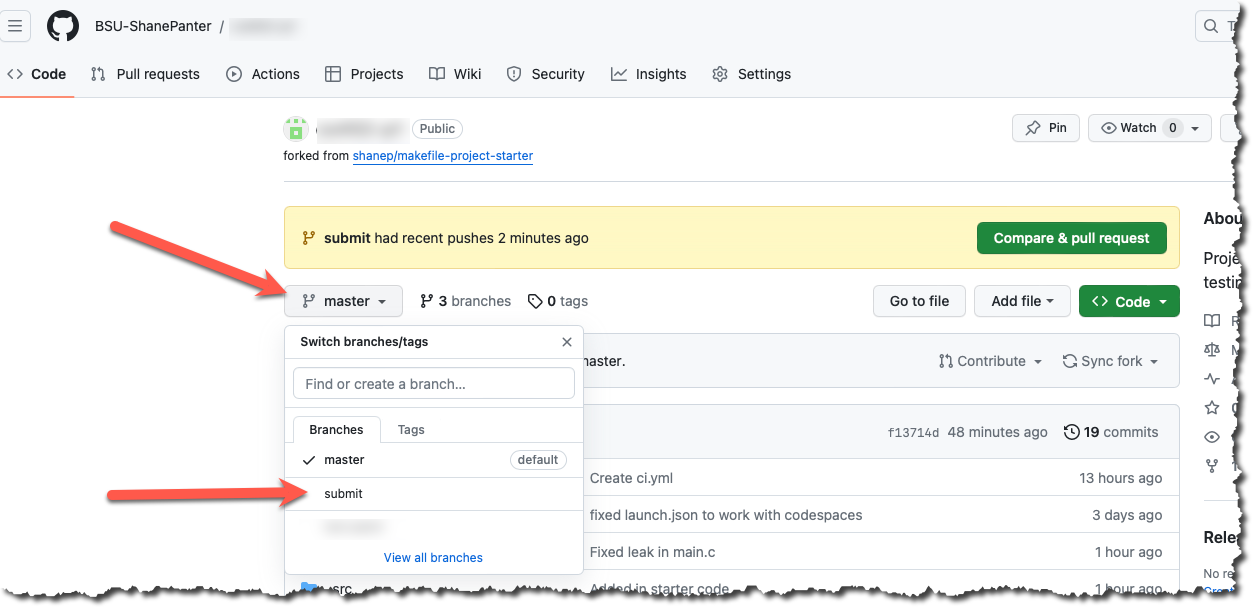
- First lets fetch the upstream branch. This is the branch that you originally forked from at the start of the project
git fetch upstream- Checkout a new branch named submit from the
upstream/masterbranch.
git checkout upstream/master -b submit- Now we will do a squash merge all the commits we did onto our new submit branch.
git merge --squash master- Now commit those new changes to your submit branch
git commit -m "Submit project"- Push your submit branch to GitHub
git push -u origin- Open up a web browser and navigate to your repository on GitHub and confirm that your submit branch is correctly pushed. Open up the files and make sure that everything looks good before going to the next step.
Install Libraries
If you are working on codespaces you will need to install the required dependencies before you attempt to email out your patch file.
make install-depsEmail Patch File
First make sure you are still on the submit branch that you created. If you type git branch you should see a star next to the submit branch that indicates you are currently on the submit branch.
$ git branch
  master
* submit
WARNING
You MUST test your patch by emailing it to yourself first! You will go through all the steps below with your own email. After you have sent the email to yourself and tested it you can then email your submission to the class mailing list!
Finally we can create our patch to email out!
git send-email --to youremail@u.boisestate.edu HEAD^You should see results similar to what is show below.
$ git send-email --to youremail@u.boisestate.edu HEAD^
/tmp/T/NWEw4f1sIj/0001-Submit-project-2.patch

From: youremail@u.boisestate.edu
To:  youremail@u.boisestate.edu
Subject: [PATCH] Submit project
Date: Thu,  7 Dec 2023 20:31:55 -0700
Message-Id: <20231208033155.83099-1-shanepanter@boisestate.edu>
X-Mailer: git-send-email 2.39.3 (Apple Git-145)
MIME-Version: 1.0
Content-Transfer-Encoding: 8bit

The Cc list above has been expanded by additional
addresses found in the patch commit message. By default
send-email prompts before sending whenever this occurs.
This behavior is controlled by the sendemail.confirm
configuration setting.

For additional information, run 'git send-email --help'.
To retain the current behavior, but squelch this message,
run 'git config --global sendemail.confirm auto'.

Send this email? ([y]es|[n]o|[e]dit|[q]uit|[a]ll): y
OK. Log says:
Server: smtp.gmail.com
MAIL FROM:  youremail@u.boisestate.edu
RCPT TO:  youremail@u.boisestate.edu
RCPT TO:  youremail@u.boisestate.edu
From: youremail@u.boisestate.edu
To:  youremail@u.boisestate.edu
Subject: [PATCH] Submit project 2
Date: Thu,  7 Dec 2023 20:31:55 -0700
Message-Id: <20231208033155.83099-1-shanepanter@boisestate.edu>
X-Mailer: git-send-email 2.39.3 (Apple Git-145)
MIME-Version: 1.0
Content-Transfer-Encoding: 8bit

Result: 250
You should now be able to check your email and see your patch. Be aware that sometimes email delivery is slightly delayed so you may have to wait a few minutes for it to show up. Make sure and check your spam folder if you don't see any mail.
Test your patch
You can now get your patch from Gmail and test it to make sure that everything works and your patch was correct.
- Checkout a new branch named
test-patchfrom the upstream/master branch
git checkout upstream/master -b test-patch- Push your new
test-patchbranch to your repo instead of the upstream
git push -u origin- Get the patch file from Gmail
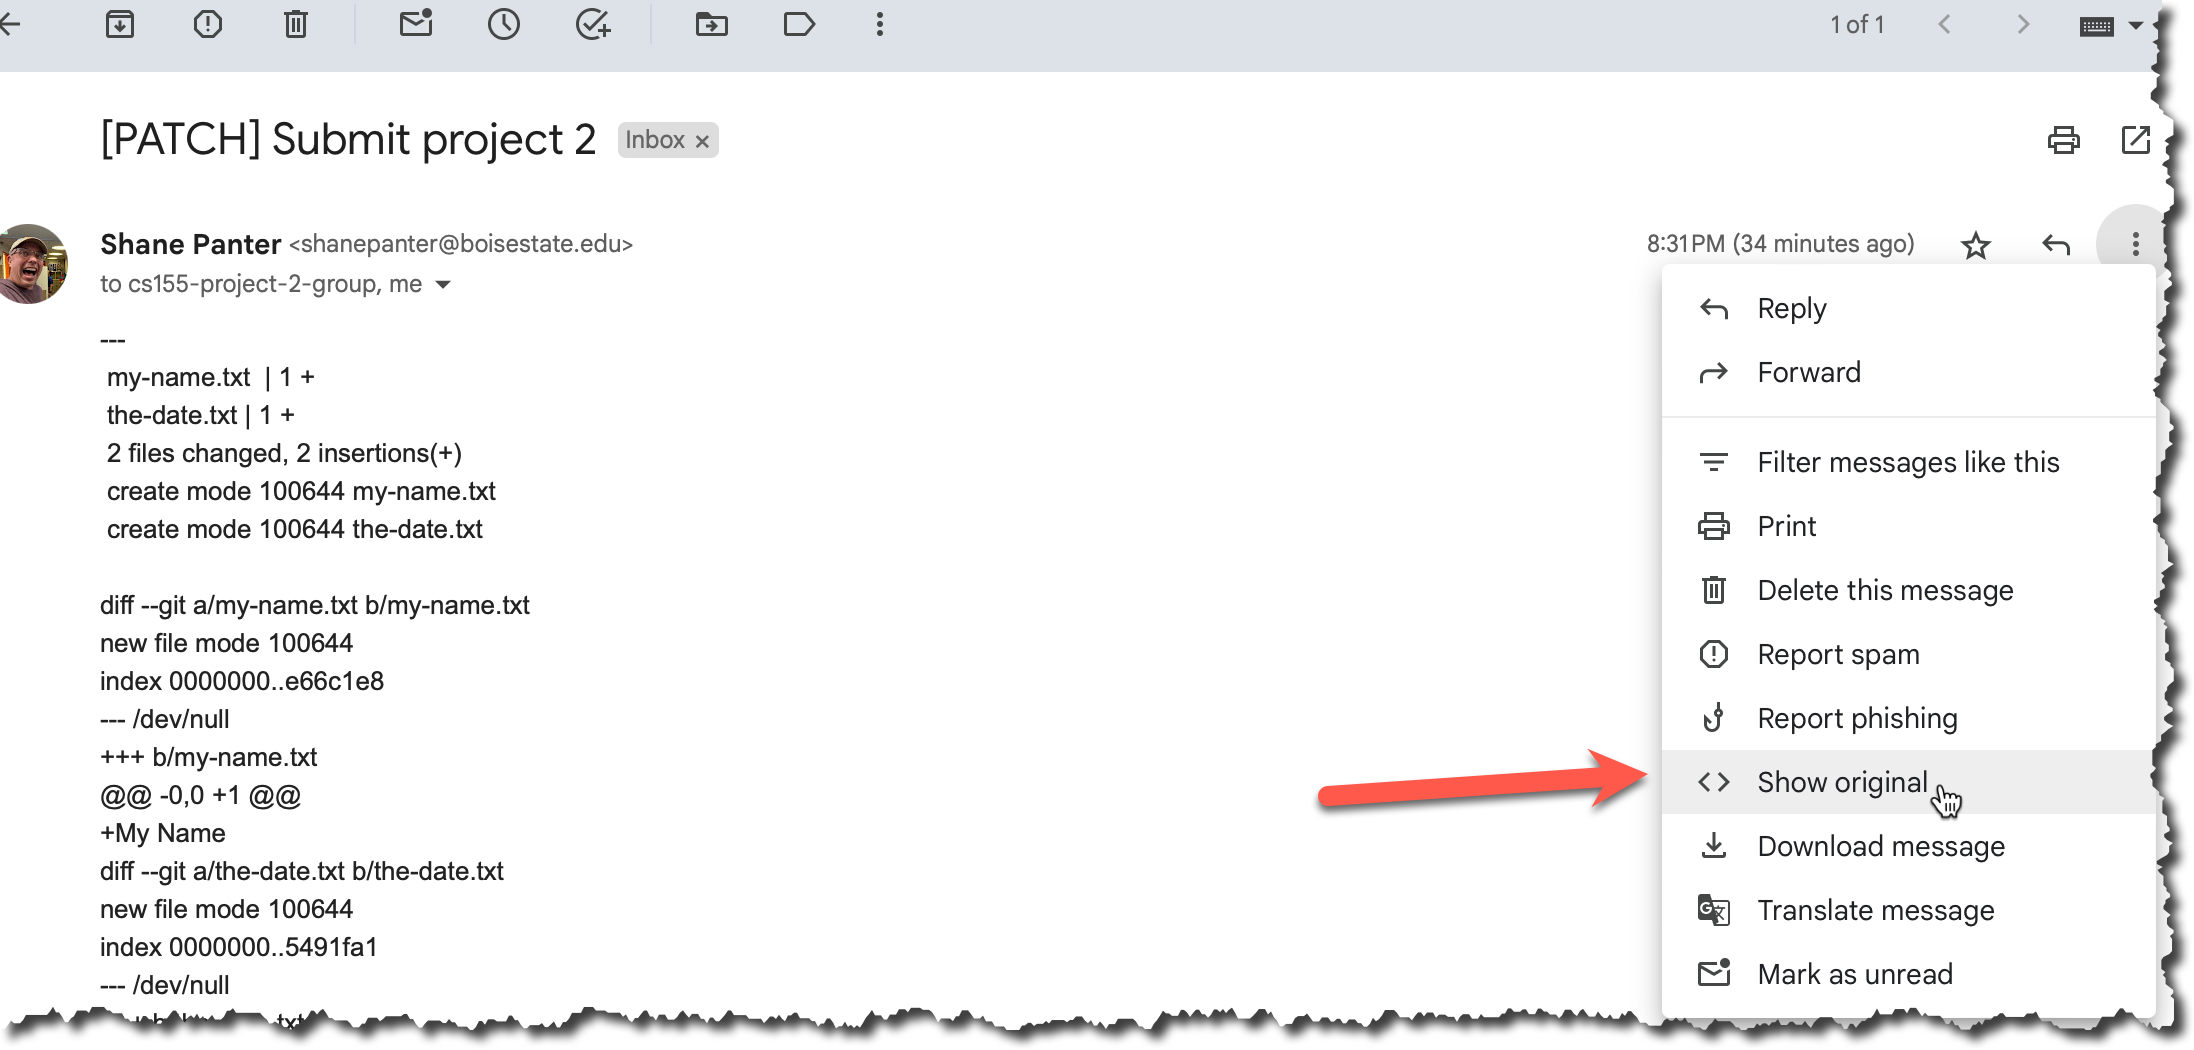
- Copy the email to your clip board
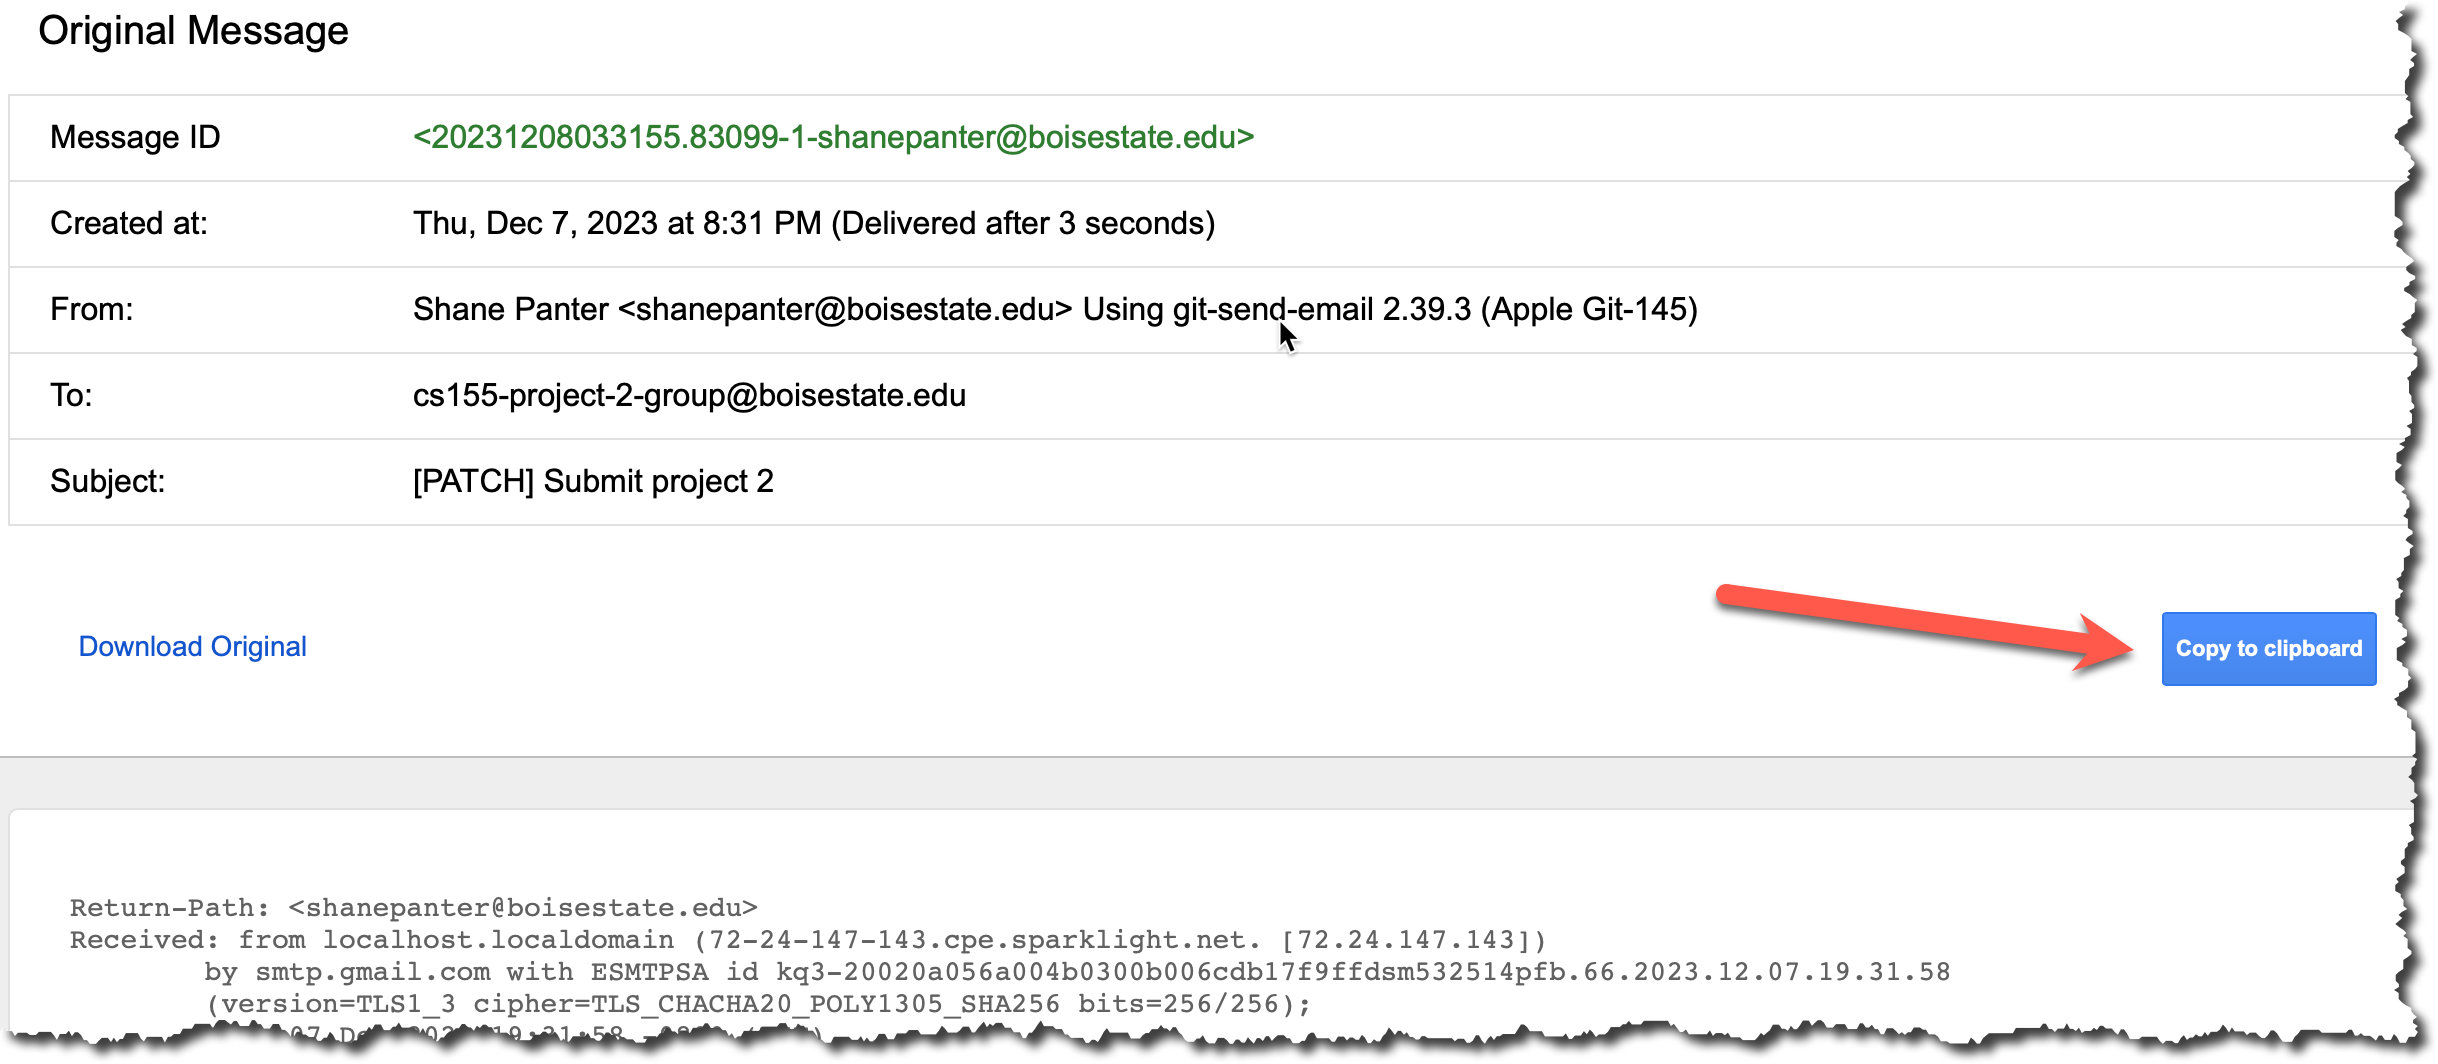
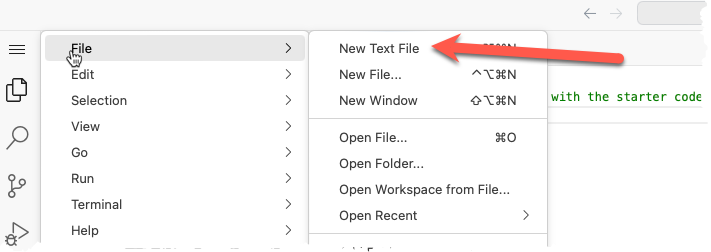
- Create a new file and paste the contents that you just copied and save it in the root folder in a file named
my-patch.txt.
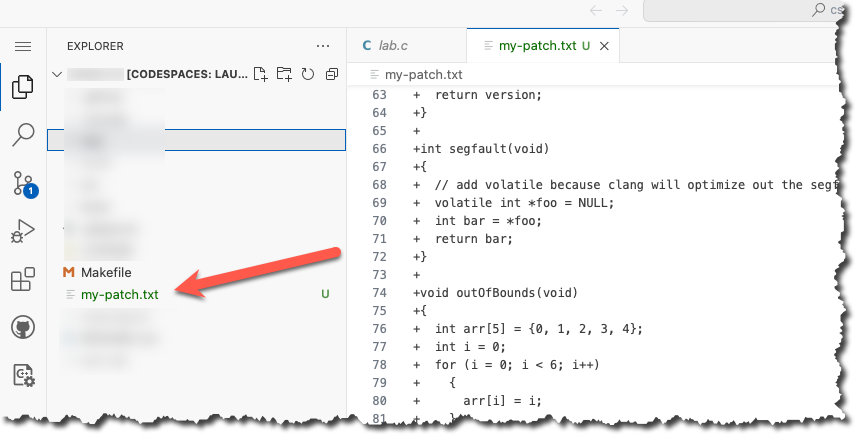
- Make sure you saved the file correctly. It should show up in the file explorer as shown below.
- Now apply that patch to your new
test-patchbranch
git am my-patch.txt- Commit your patch
git commit -m "Testing my email patch"- Push your test patch branch to your Github Account
git pushAfter you have successfully applied the patch you can delete the file
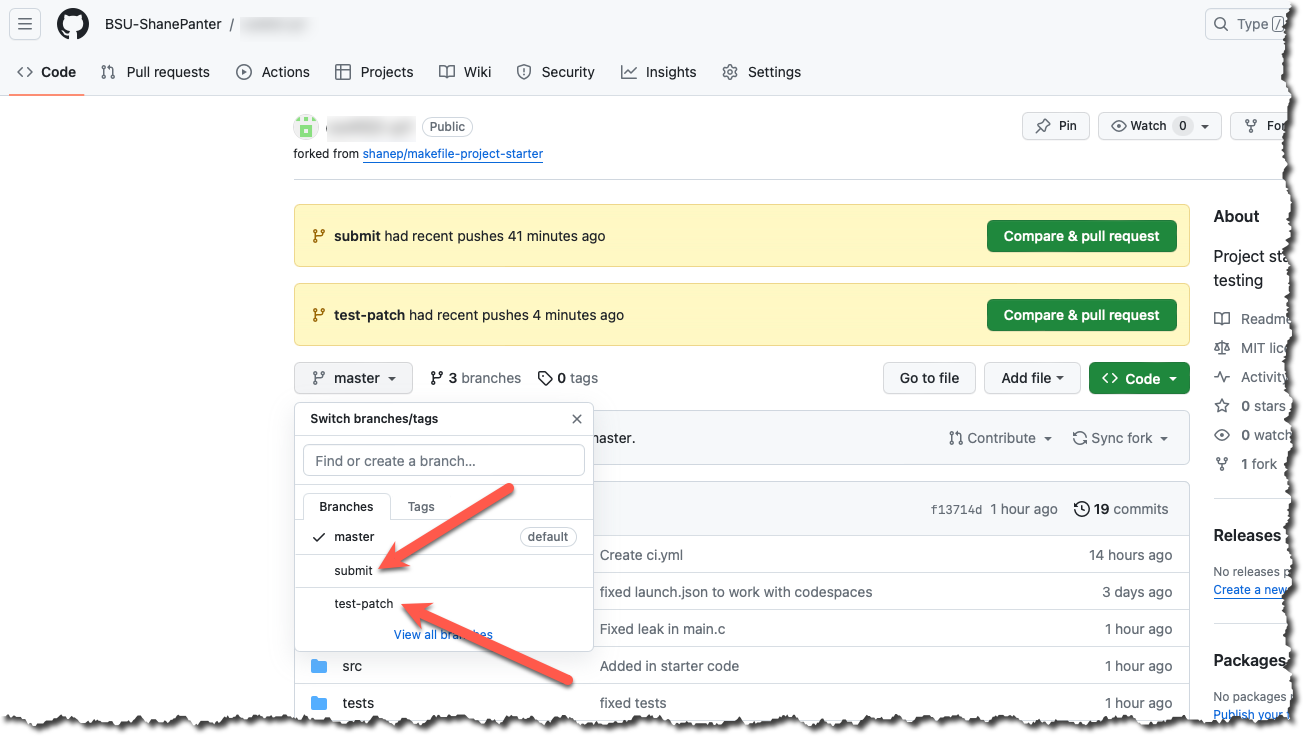
my-patch.txt. Don't commit the filemy-patch.txtit is just a temporary file that you don't want to save.Finally open up the browser again and make sure you have 3 branches
master,submit, andtest-patch. Thesubmitandtest-patchbranches should be identical. Each should have exactly 1 commit from you with all your changes.
Submit your Patch for grading
Assuming you have successfully completed all the steps above with your own email and everything looked good you can now submit your patch for grading.
DANGER
Do not use the class mailing list to test your patch. You should only send an email to email is in the syllabus after you have tested the process with your own email. Spamming the mailing list with excessive patches will result in a lower grade.
When you submit to the mailing list you will automatically be cc'd on the email so you will have a copy in your own email as proof that you completed the assignment.
You are allowed to submit up to 3 times without penalty.
Open a terminal and submit your patch.
git checkout submit
git send-email --to email is in the syllabus HEAD^
Assuming all went well you are now complete! You have created a patch file from a squash merge, emailed it and tested the resulting patch. You are well on your way to becoming an advanced git user!
Submitting
You do not need to submit anything to canvas for this assignment. Your email is your submission, your grade will be updated after the due date (and late window) have passed.