Homework 2
In this homework you will learn how to use git to create a patch that can be emailed to another developer. This method of development is how git was originally designed to work and is still widely used by massive projects like the Linux Kernel. It may take a few attempts to get everything correct but once you are able to wrap your head around the process you will have unlocked a powerful software development skill!
Task 1 - Setup
Follow the steps below to get your repository all setup and ready to use. The steps below show you how to use and setup GitHub codespaces. You are not required to use codespaces, all the steps below can be completed in the CS Lab or on your personal machine if you prefer.
Fork the starter repository
- Fork the starter repository into your personal GitHub account: https://github.com/shanep/git-send-email
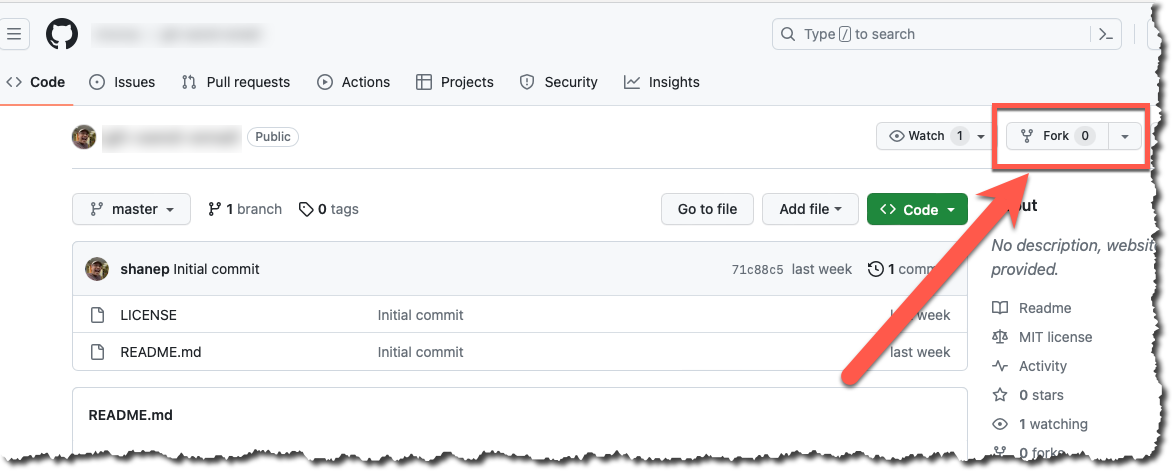
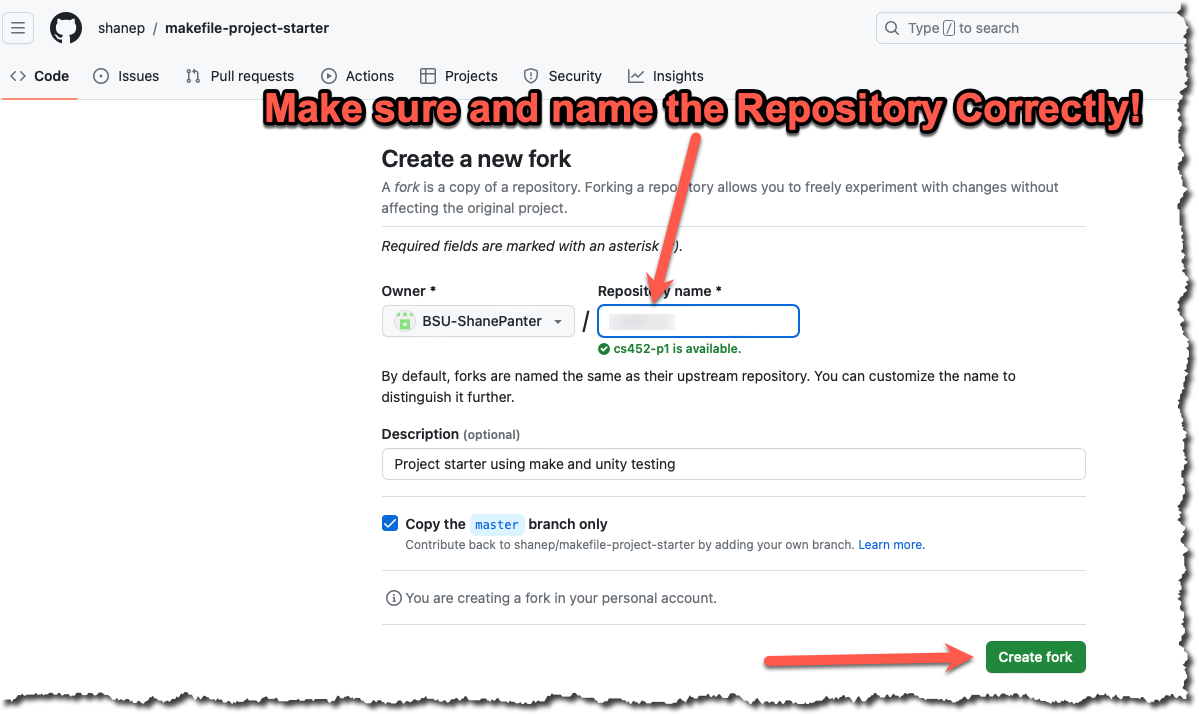
- In the new fork name the repository cs452-hw-2
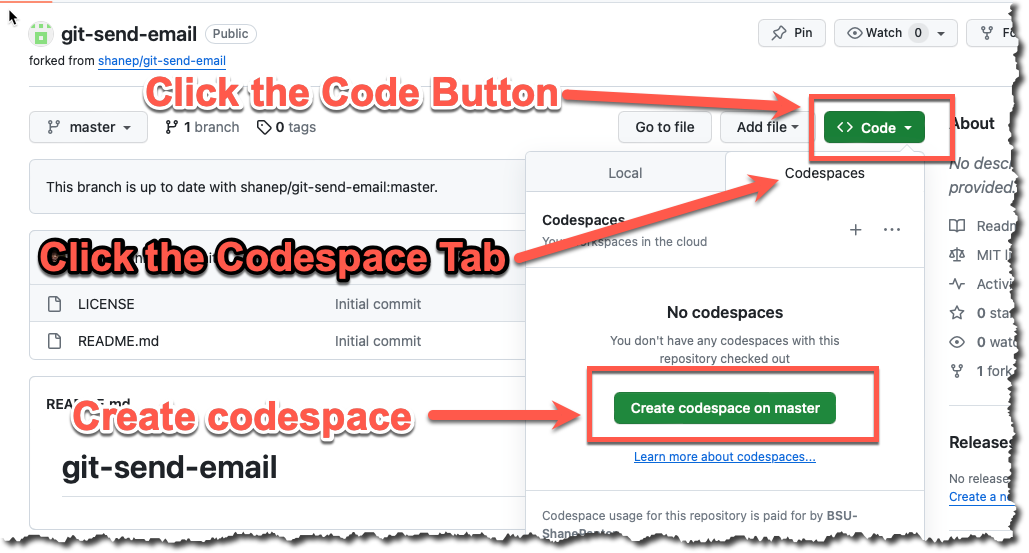
Start a new Codespace
We will use GitHub Codespaces to do most of our coding. Codespaces is just VSCode in the cloud. This makes it really easy to setup a developer environment and code from any computer that has a browser and internet connection!
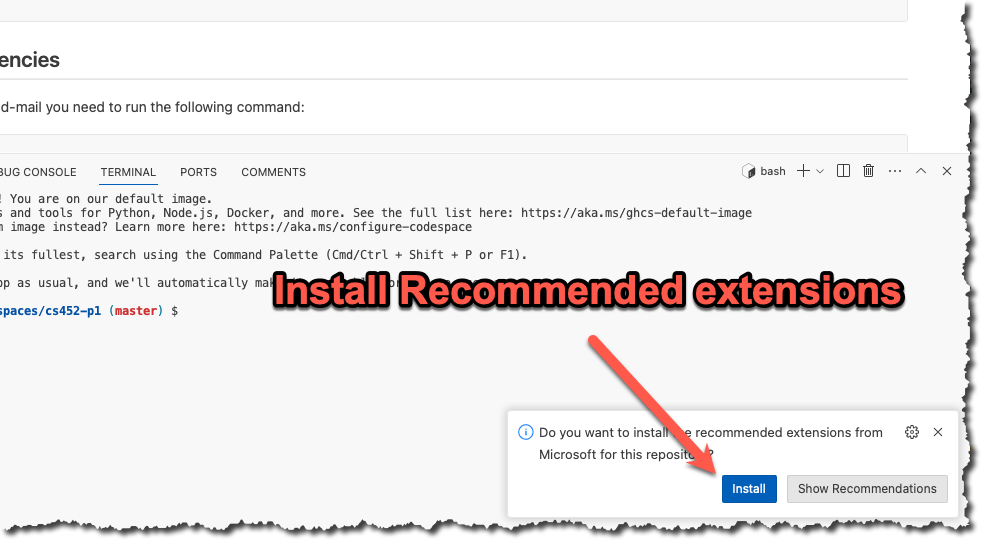
- If you are asked to install recommended extensions click "install". You may not be asked to install extensions if you are already syncing your account.
You now should have a new repository (forked from the starter template) that is ready to use.
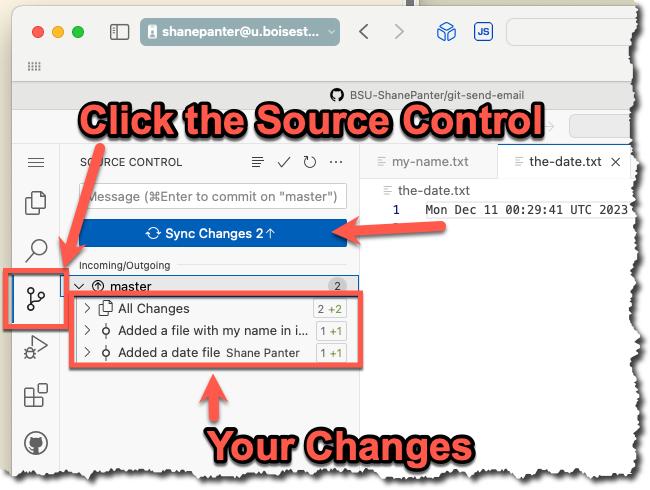
Task 2 - Create Some commits
- Create your first commit using the terminal
date >> the-date.txt
git add the-date.txt
git commit -m "Added a date file"- Create your second commit using the terminal
echo "My Name" > my-name.txt
git add my-name.txt
git commit -m "Added a file with my name in it"- Make sure everything looks good.
shane|(master>):git-send-email$ git status
On branch master
Your branch is ahead of 'origin/master' by 2 commits.
  (use "git push" to publish your local commits)

nothing to commit, working tree clean- Push your changes to your repository.
Final Task - Submit your code
Now that you have completed all the tasks the only thing left to do is to submit your code as a patch so you can receive a grade for all your hard work.
Turn on Two Factor
Turn on Two factor authentication for your Boise State provided email account
DANGER
Do NOT skip this step. Boise State University uses Gmail as their email provider and Gmail requires you to use two factor authentication in order to generate an app password.
You need to use your Boise State University issued email account to send the email and you must have two factor authentication turned on.
Generate an app password
INFO
If you are working in GitHub codespaces you will need to setup SMTP for EACH project. This is because each codespace is tied to a specific repository and the settings are not shared. However, if you are working on your own personal machine or in the CS Lab then you will only have to setup SMTP once!
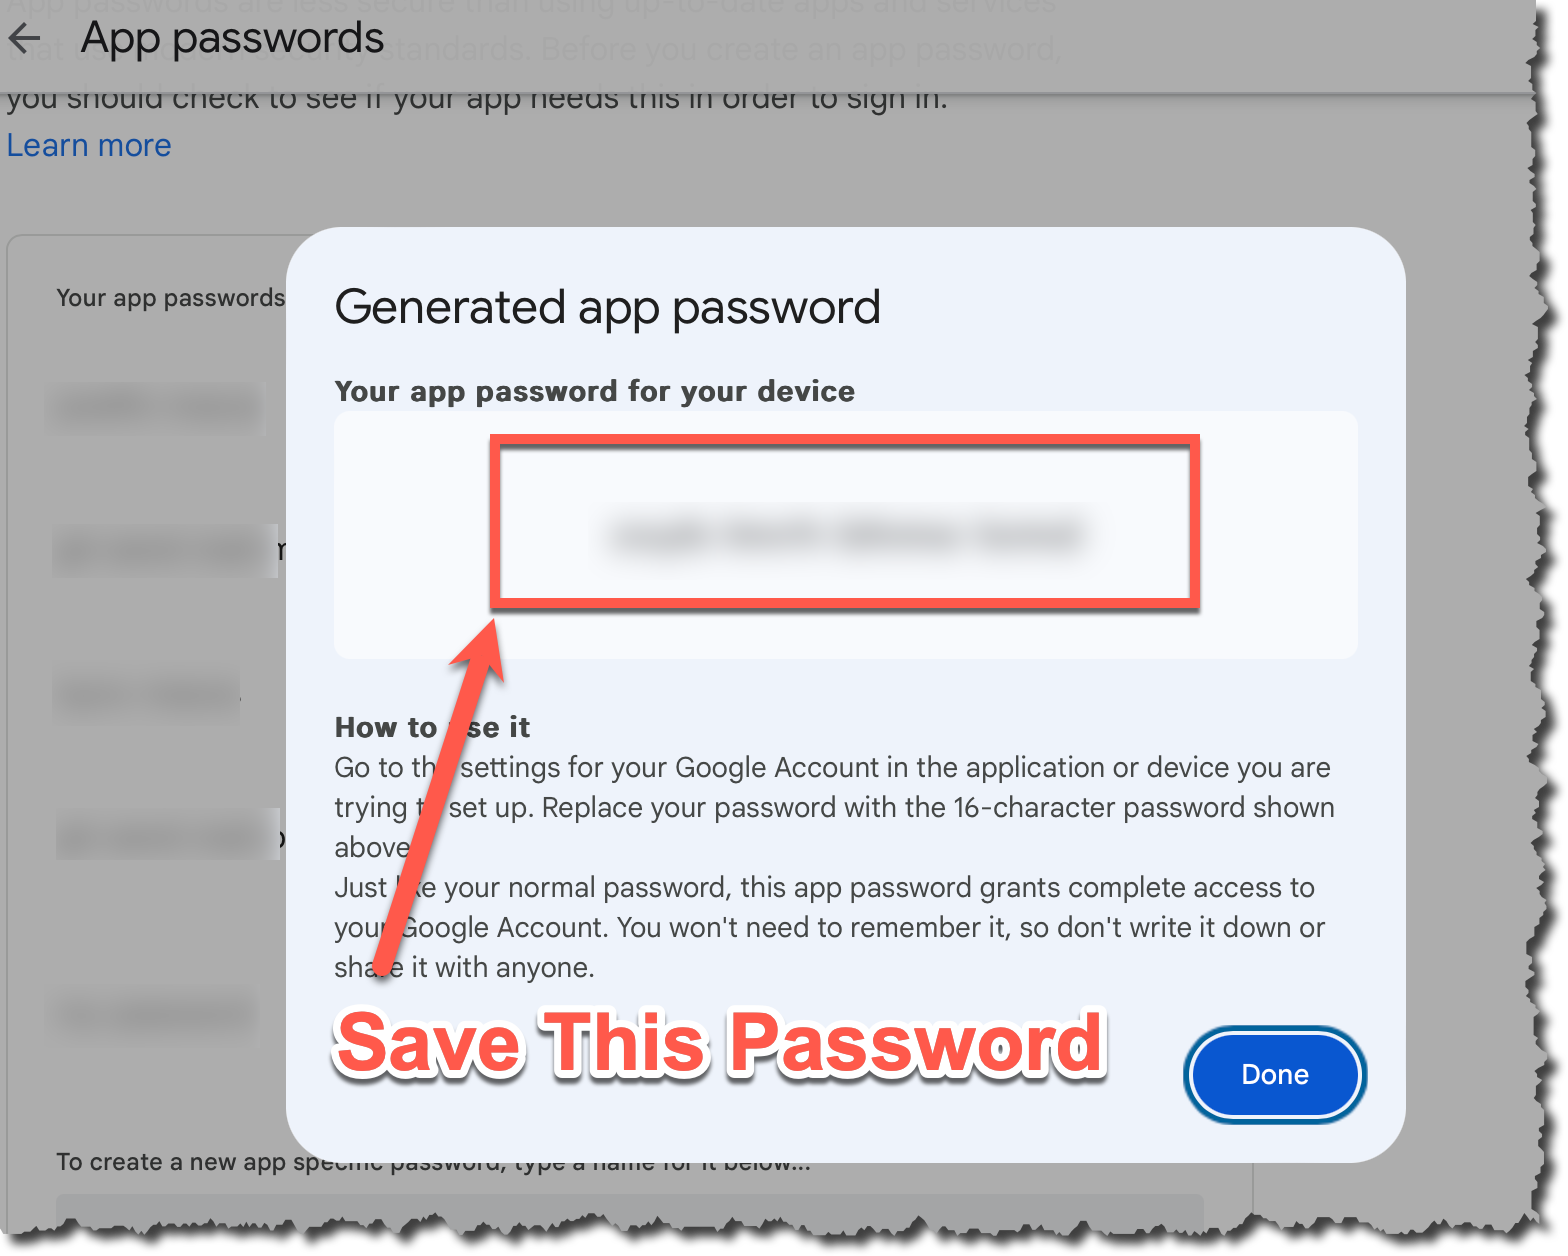
In order to use git send-email you will need to generate an app password. Navigate to https://security.google.com/settings/security/apppasswords and generate a new app password. Make sure and copy the password before you close the window because you will not be able to see it again.
I can't generate a password
If you get the error shown below it typically means that you have not enabled two factor authentication. Follow these steps to resolve the issue:
- Go back and ensure you have two factor authentication enabled.
- Log out of your Gmail account
- Log back into your Gmail account and make sure you did have to use two factor authentication
- If the steps above fail then open an incognito tab and go back to the first step
- If you still have issues reboot your machine and go back to the first step

Setup SMTP
- Open up a terminal in codespaces
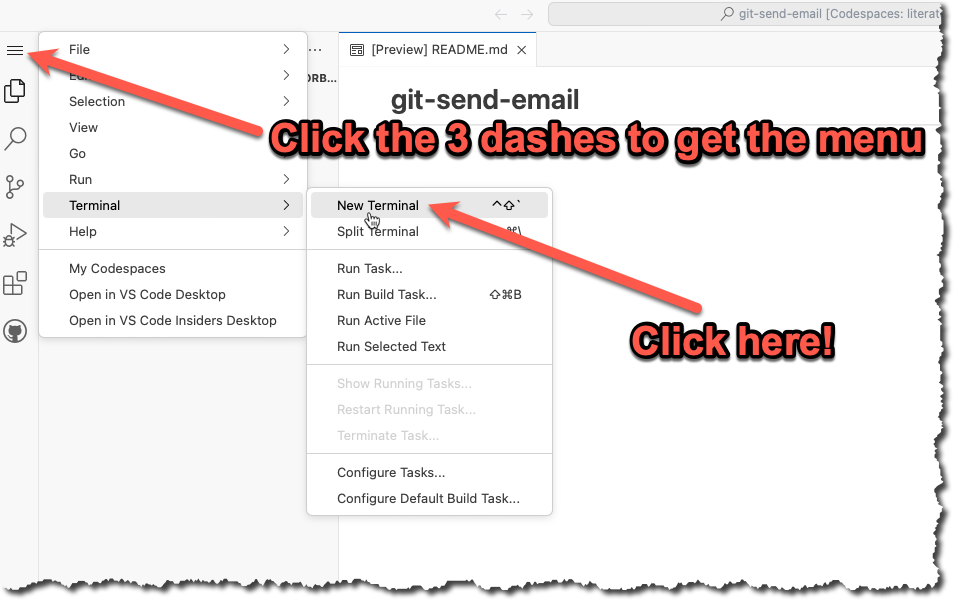
- In the terminal type
git config --global --editand modify the file with the info listed below. You will need to change the info listed below to match your own name, email and App Password that you generated in the previous step.
[User]
	name =  YOUR NAME
	email = YOURNAME@u.boisestate.edu
[sendemail]
	smtpserver = smtp.gmail.com
	smtpuser = YOURNAME@u.boisestate.edu
	smtpPass = xxxx xxxx xxxx xxxx
	smtpencryption = ssl
	smtpserverport = 465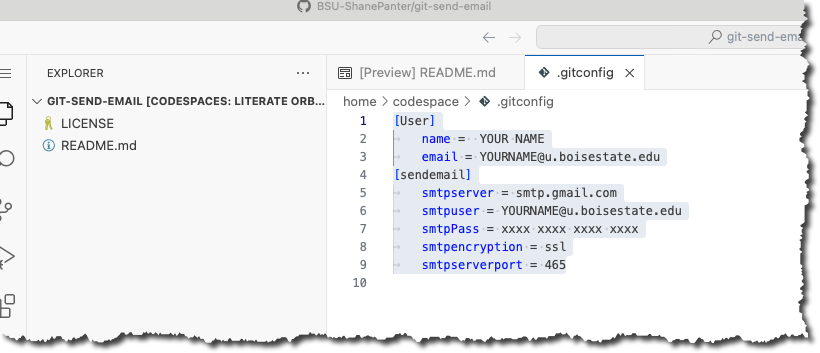
Congrats you should be all setup to send code patch's over email. Now lets create a patch!
Create a patch file
We are now going to do what is called a squash merge and then create a patch file with all our changes in one commit.
- First lets fetch the upstream branch. This is the branch that you originally forked from at the start of the project
git fetch upstream- Checkout a new branch named submit from the
upstream/masterbranch.
git checkout upstream/master -b submit- Now we will do a squash merge all the commits we did onto our new submit branch.
git merge --squash master- Now commit those new changes to your submit branch
git commit -m "Submit project"- Push your submit branch to GitHub
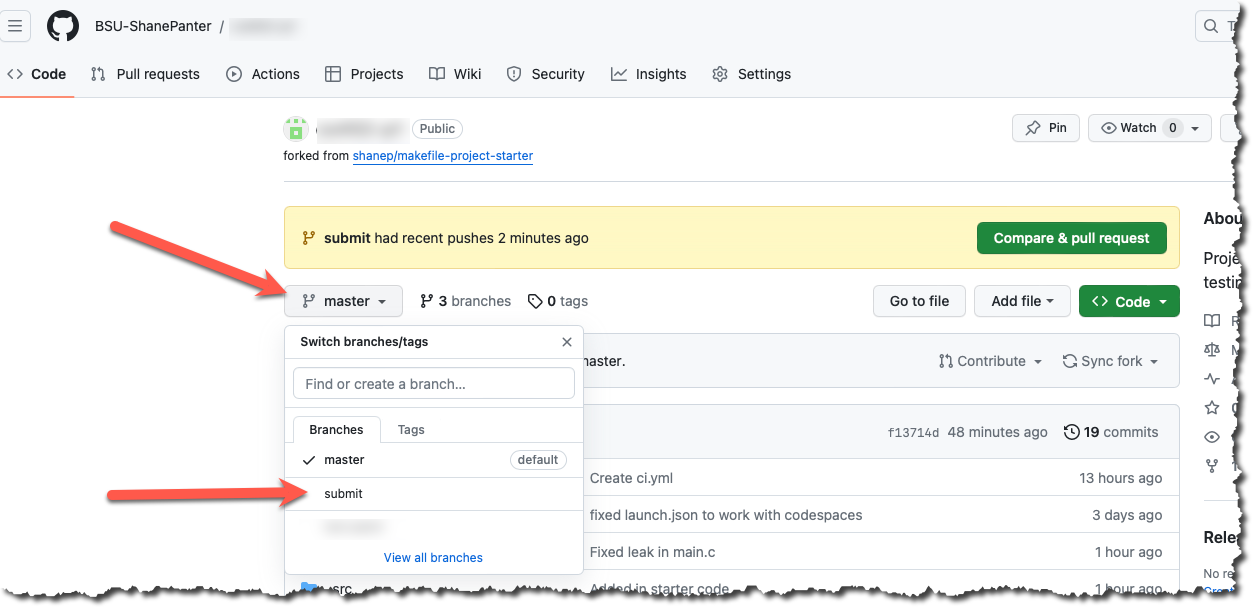
git push -u origin- Open up a web browser and navigate to your repository on GitHub and confirm that your submit branch is correctly pushed. Open up the files and make sure that everything looks good before going to the next step.
Install Libraries
If you are working on codespaces you will need to install the required dependencies before you attempt to email out your patch file.
make install-depsEmail Patch File
First make sure you are still on the submit branch that you created. If you type git branch you should see a star next to the submit branch that indicates you are currently on the submit branch.
$ git branch
  master
* submit
WARNING
You MUST test your patch by emailing it to yourself first! You will go through all the steps below with your own email. After you have sent the email to yourself and tested it you can then email your submission to the class mailing list!
Finally we can create our patch to email out!
git send-email --to youremail@u.boisestate.edu HEAD^You should see results similar to what is show below.
$ git send-email --to youremail@u.boisestate.edu HEAD^
/tmp/T/NWEw4f1sIj/0001-Submit-project-2.patch

From: youremail@u.boisestate.edu
To:  youremail@u.boisestate.edu
Subject: [PATCH] Submit project
Date: Thu,  7 Dec 2023 20:31:55 -0700
Message-Id: <20231208033155.83099-1-shanepanter@boisestate.edu>
X-Mailer: git-send-email 2.39.3 (Apple Git-145)
MIME-Version: 1.0
Content-Transfer-Encoding: 8bit

The Cc list above has been expanded by additional
addresses found in the patch commit message. By default
send-email prompts before sending whenever this occurs.
This behavior is controlled by the sendemail.confirm
configuration setting.

For additional information, run 'git send-email --help'.
To retain the current behavior, but squelch this message,
run 'git config --global sendemail.confirm auto'.

Send this email? ([y]es|[n]o|[e]dit|[q]uit|[a]ll): y
OK. Log says:
Server: smtp.gmail.com
MAIL FROM:  youremail@u.boisestate.edu
RCPT TO:  youremail@u.boisestate.edu
RCPT TO:  youremail@u.boisestate.edu
From: youremail@u.boisestate.edu
To:  youremail@u.boisestate.edu
Subject: [PATCH] Submit project 2
Date: Thu,  7 Dec 2023 20:31:55 -0700
Message-Id: <20231208033155.83099-1-shanepanter@boisestate.edu>
X-Mailer: git-send-email 2.39.3 (Apple Git-145)
MIME-Version: 1.0
Content-Transfer-Encoding: 8bit

Result: 250
You should now be able to check your email and see your patch. Be aware that sometimes email delivery is slightly delayed so you may have to wait a few minutes for it to show up. Make sure and check your spam folder if you don't see any mail.
Test your patch
You can now get your patch from Gmail and test it to make sure that everything works and your patch was correct.
- Checkout a new branch named
test-patchfrom the upstream/master branch
git checkout upstream/master -b test-patch- Push your new
test-patchbranch to your repo instead of the upstream
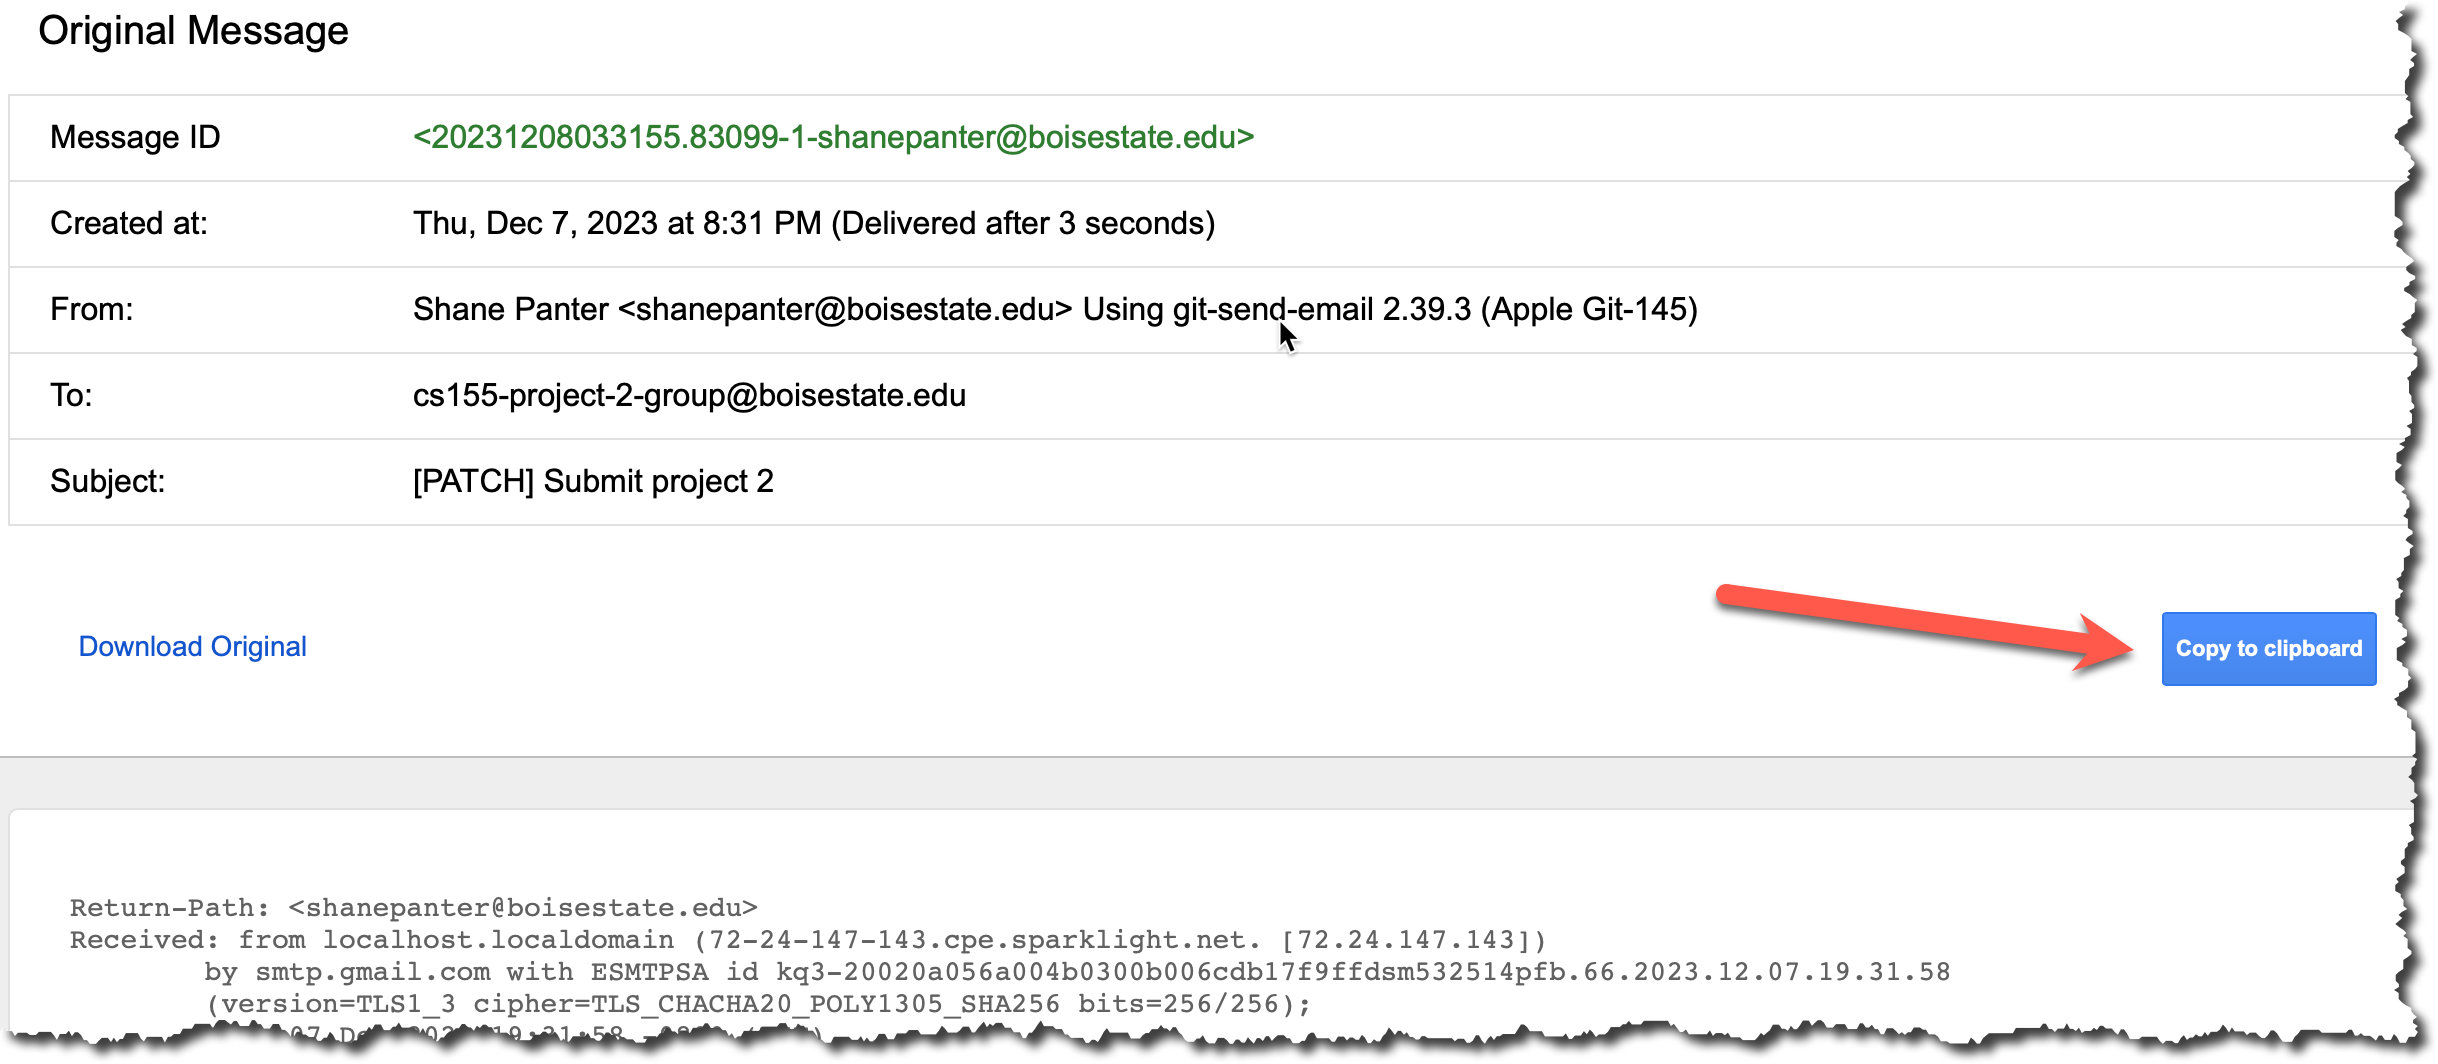
git push -u origin- Get the patch file from Gmail
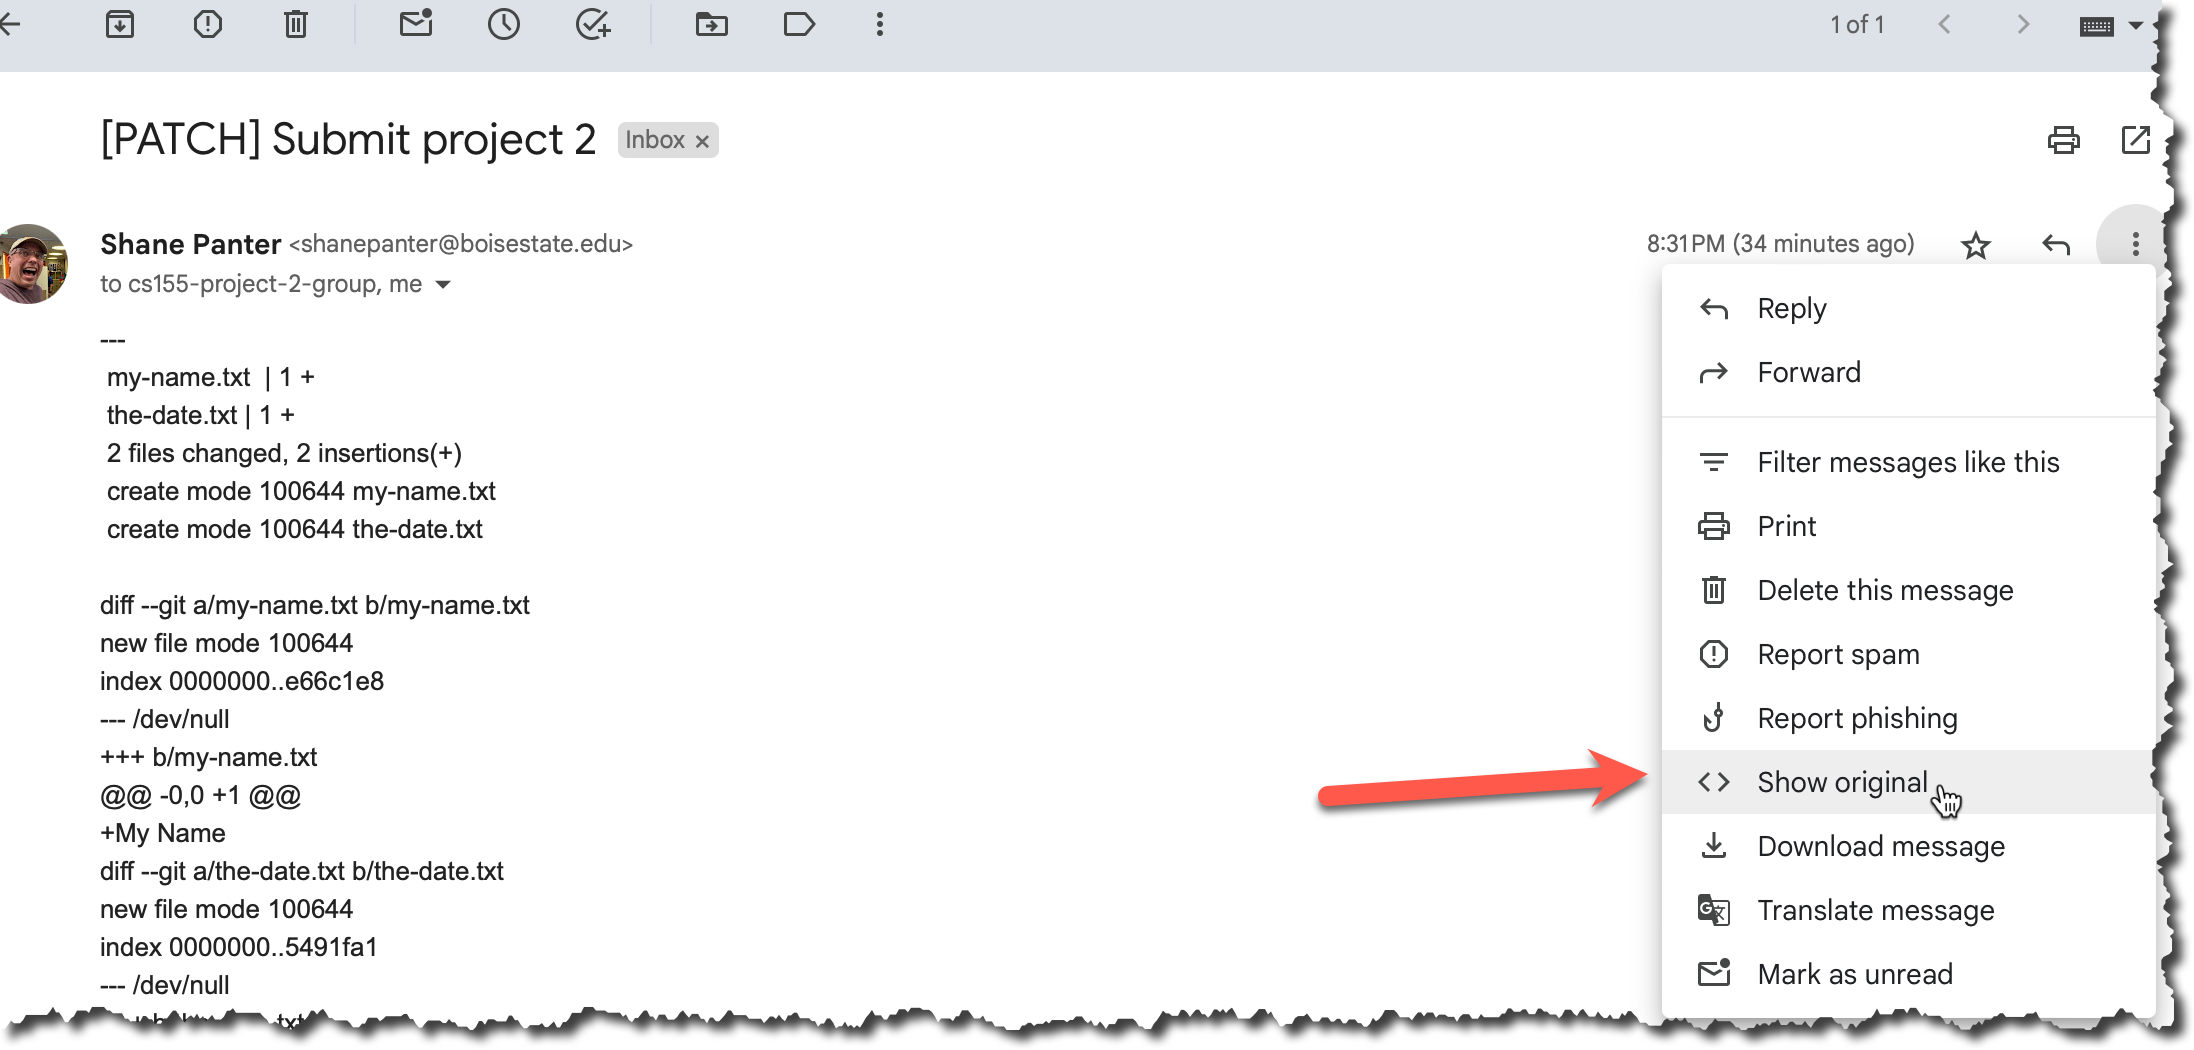
- Copy the email to your clip board
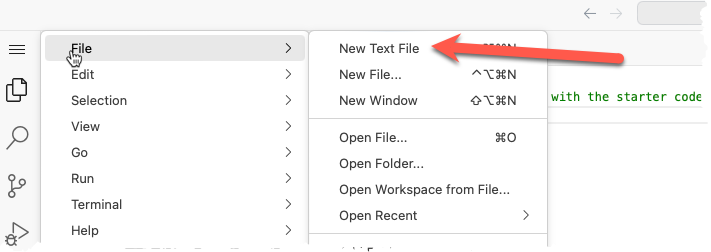
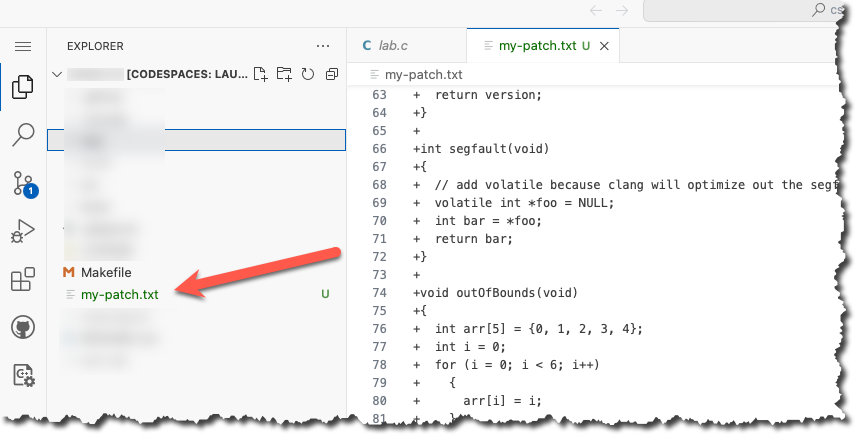
- Create a new file and paste the contents that you just copied and save it in the root folder in a file named
my-patch.txt.
- Make sure you saved the file correctly. It should show up in the file explorer as shown below.
- Now apply that patch to your new
test-patchbranch
git am my-patch.txt- Commit your patch
git commit -m "Testing my email patch"- Push your test patch branch to your Github Account
git pushAfter you have successfully applied the patch you can delete the file
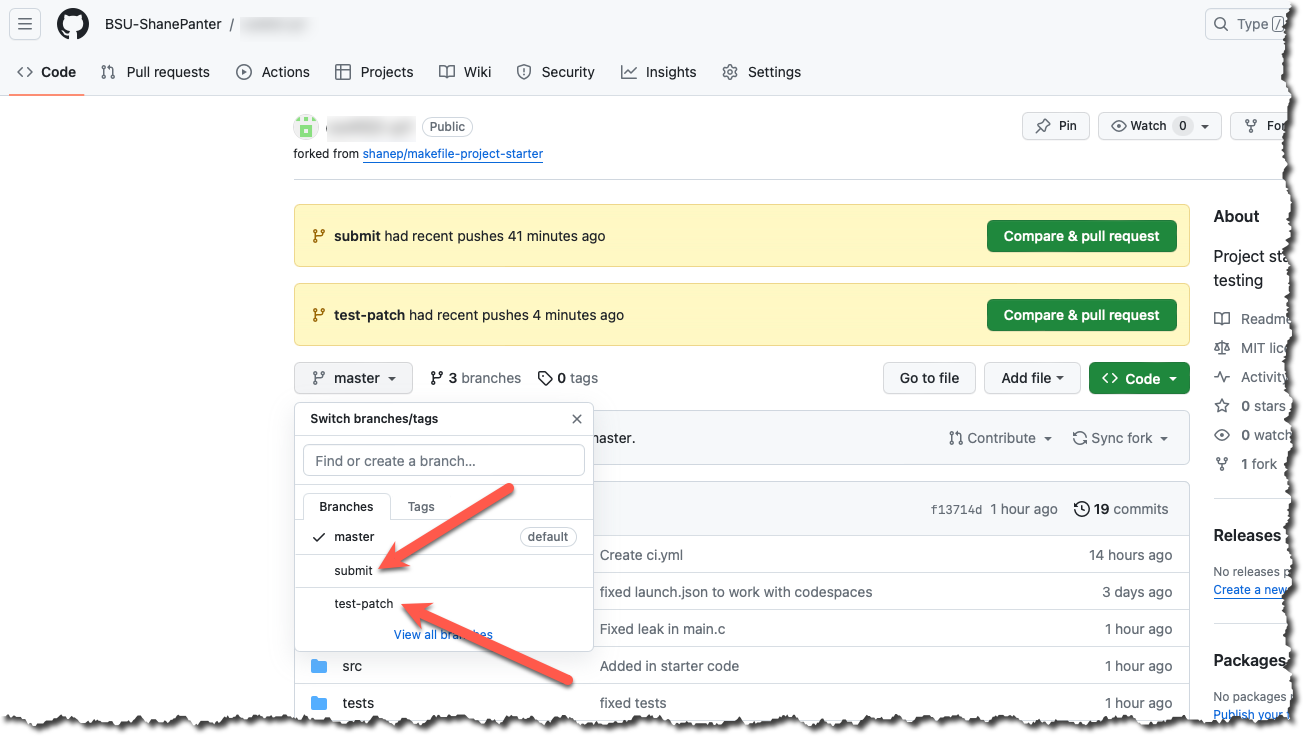
my-patch.txt. Don't commit the filemy-patch.txtit is just a temporary file that you don't want to save.Finally open up the browser again and make sure you have 3 branches
master,submit, andtest-patch. Thesubmitandtest-patchbranches should be identical. Each should have exactly 1 commit from you with all your changes.
Submit your Patch for grading
Assuming you have successfully completed all the steps above with your own email and everything looked good you can now submit your patch for grading.
DANGER
Do not use the class mailing list to test your patch. You should only send an email to email is in the syllabus after you have tested the process with your own email. Spamming the mailing list with excessive patches will result in a lower grade.
When you submit to the mailing list you will automatically be cc'd on the email so you will have a copy in your own email as proof that you completed the assignment.
You are allowed to submit up to 3 times without penalty.
Open a terminal and submit your patch.
git checkout submit
git send-email --to email is in the syllabus HEAD^
Assuming all went well you are now complete! You have created a patch file from a squash merge, emailed it and tested the resulting patch. You are well on your way to becoming an advanced git user!
Submitting
You do not need to submit anything to canvas for this assignment. Your email is your submission, your grade will be updated after the due date (and late window) have passed.