VSCode Tips and Tricks
This document will walk you through doing development using VSCode and introduce you to some cool tips and tricks. You can install VSCode on your personal machine, or you can use VSCode in the cloud with GitHub Codespaces.
Install VSCode
You can install VSCode and all the required tools on your personal (local) machine. The advantages of using a local install is it is 100% free and you don’t need an internet connection to do your work. The disadvantage is it can sometimes be difficult and time consuming to install and configure all the tools correctly, especially if you are using the Windows operating system.
- Install Git
- Install Visual Studio Code
- Read through the User interface tutorial
- Read Terminal Basics
- Complete all the steps in the first-time configuration section of this document.
First time configuration
Before we start using VSCode we need to set a few basic configurations. Each section is clearly labeled with what operating system it applies to. You need to follow these steps on both local and remote setups.
Configure defaults
This section must be completed on ALL operating systems.
The last step before beginning to write code is to configure the user tags that will be stored as metadata on each commit for your development environment. To do this, open VSCode then click View in the top menu and select Terminal. Enter the following commands in the terminal, using your name and email address
git config --global user.name "Your Name"
git config --global user.email "you@example.com"
When you are first learning to use git using a rebase workflow can help to reduce the number of conflicts that you have to deal with. Thus, we will set it as the default method when pulling down code.
git config --global pull.rebase true
git config --global fetch.prune true
git config --global diff.colorMoved zebra
git config --global core.ignorecase false
Additional reading:
Configure the default terminal (Windows Only)
This section only applies to Windows users who are developing locally. If "Git Bash" is not listed as an option, you need to install Git as detailed in the first section of this document.
VSCode defaults to powershell on Windows. While powershell is a great terminal all the scripts in my classes require Git Bash. So it is best to set the default terminal to Git Bash so everything works correctly
- Open Visual Studio Code
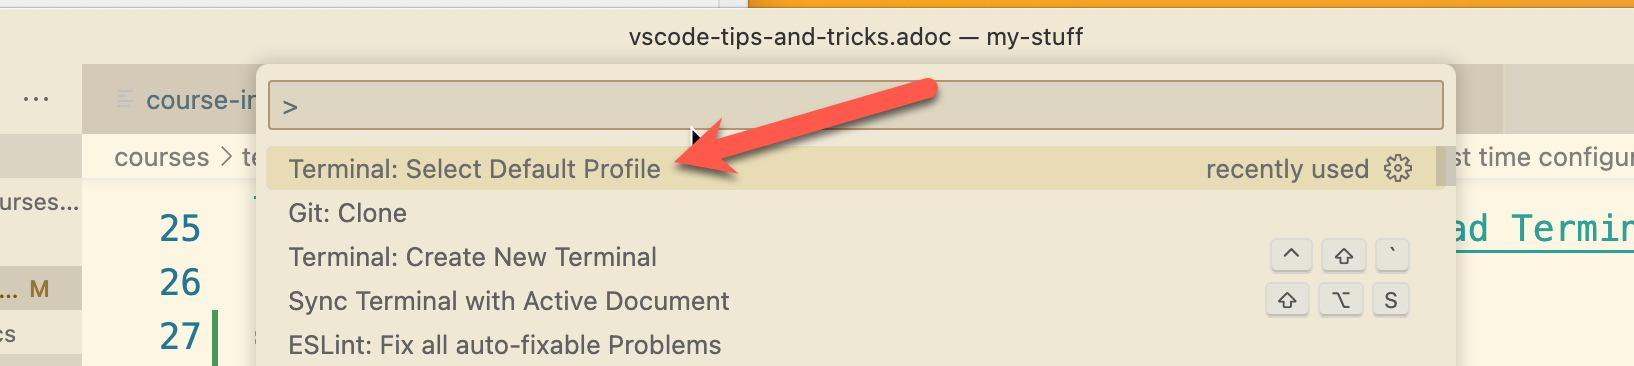
- Press CTRL + SHIFT + P to open the Command Palette
- Search for “Terminal: Select Default Profile”
- Select "Git Bash"